
- Home
- Transferring Files
- Connecting Devices and Starting Nikon Transfer 2
- Starting Nikon Transfer 2 from Device Stage Icon (Windows 7)
Font size
- S
- M
- L
Starting Nikon Transfer 2 from Device Stage Icon (Windows 7)
You can start Nikon Transfer 2 from the Device Stage icon if it is displayed in the taskbar when the camera or memory card is connected.
For details on starting Nikon Transfer 2 independently, refer to "Starting and Exiting Nikon Transfer 2".
- Connect the camera to the computer and turn the camera on.
A camera icon will appear in the taskbar.
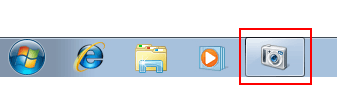
- Click the camera icon.
Camera options appear. Available options vary with the camera.
- Double-click [Import File].
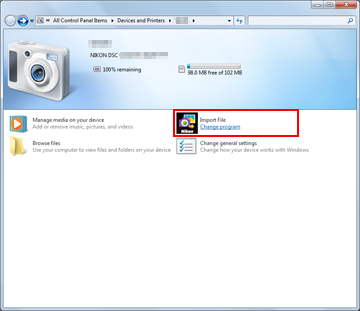 Nikon Transfer 2 automatically starts.
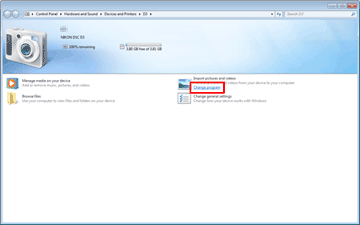
The [Import File] option is not displayed
In some cases - for example, the first time you connect the camera to the computer - the [Import File] option may not be displayed. Follow the steps below to transfer files to your computer:
- Click [Change program].
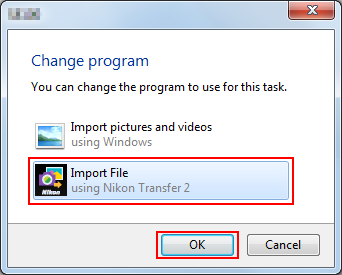
- Select [Import File using Nikon Transfer 2] and click [OK].
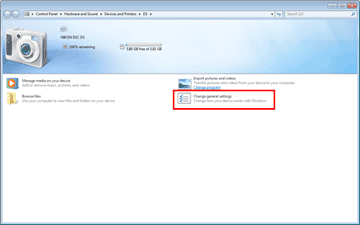
To always start Nikon Transfer 2 for file transfer
To always start Nikon Transfer 2 when the camera is connected, follow these steps:
- Double-click [Change general settings].
- Select [Import File using Nikon Transfer 2] from the [When this device connects to this computer] menu.
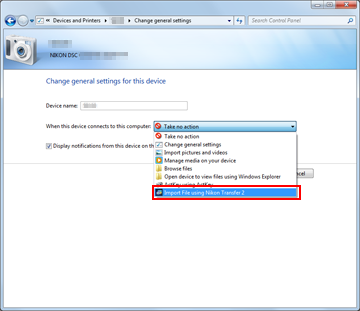
- Click [OK].
Nikon Transfer 2 will start automatically the next time the camera is connected. To prevent Nikon Transfer 2 from starting automatically, select [Take no action] for [When this device connects to this computer] in the camera [Change general settings] dialog.