
Font size
- S
- M
- L
Adding Labels
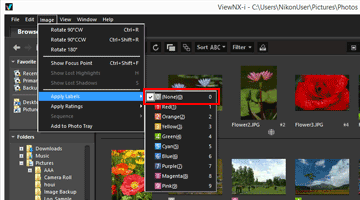
You can classify images or movies using labels. There are labels from 1 to 9, and 0 is automatically assigned to non-labeled images. Each label is identified by its unique color. You can change the title of each label.
For viewing images having labels, refer to "Showing with Labels".
- Select an image to add a label.
- Locate the cursor on [Apply Labels] in the [Image] menu, and select the desired label.
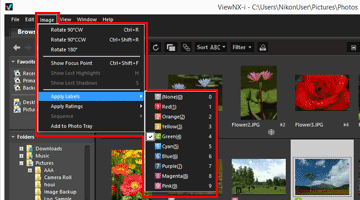 The specified label is added.
- The label is also applied to [Label] in [XMP/IPTC Information].
- For details on the XMP/IPTC information, refer to "Showing Metadata".
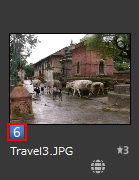
- The label is shown on the thumbnail in the Image View area or Filmstrip.
- When a label is added, the label information is saved as a separate adjustment file. The label information of the original image does not change.
Other available methods
- Select the label within [XMP/IPTC Information] on the [Adjustments/Metadata] palette.
- Select the label on the image handling tool palette in [Image Viewer], [Full Screen], or [Auto Play].
- For details on the image handling tool palette, refer to "Image Control Bar".
- Locate the cursor on a thumbnail to display the access button and add the label.
- For details on the access button, refer to "Thumbnail Arrangement".
- Press any of "0" to "9" keys on the keyboard. The label number you entered is set.
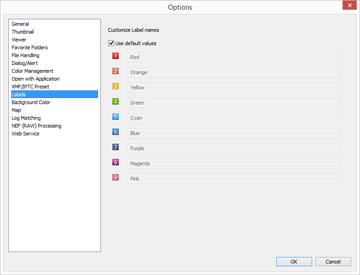
To add label name
You can change the name of a label that is shown when you select [Label] on the [Adjustments/Metadata] palette or [Apply Labels] in the [Image] menu. When a label's name is changed, the changed name will be saved to [Label] in the XMP area. Also, the changed name will be applied to XMP/IPTC Preset.
Refer to "Options/Preferences for the ViewNX-i Window" > "Labels" for details on changing a label name and "Using XMP/IPTC Preset" for details on XMP/IPTC Preset.
To clear labels
- Locate the cursor on [Apply Labels] in the [Image] menu, and select
 .
.
 The label is cleared from the selected image.