
- Home
- Adjusting Images
- Image Adjustment Flow
Font size
- S
- M
- L
Image Adjustment Flow
The procedure for adjusting RAW (NEF, NRW), JPEG and TIFF images is described below.
- Click [Edit] to switch the workspace.
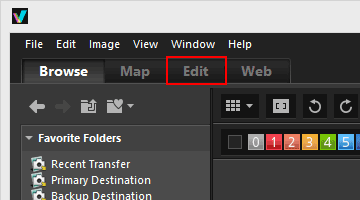 The view mode changes to [Image Viewer], and the [Adjustments/Metadata] palette opens.
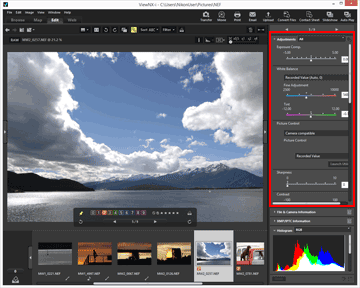
- Select the image to adjust.
You can display the Filmstrip or Photo Tray to select the image that you want to edit.
- Perform operations in the [Adjustments] pane in the upper section of the [Adjustments/Metadata] palette.
- Click
 .
.
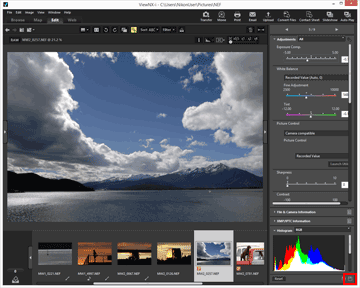 The adjustment settings are saved to the adjustment file.To cancel the adjustment, click [Reset].
Adjusting images with workspaces other than [Edit]
Images can be adjusted using the [Browse] or [Map] workspace, as well as the [Edit] workspace.
- Open the [Adjustments/Metadata] palette and click
 to the left of [Adjustments] to display adjustment items.
 - Select the image that you want to adjust in [Filmstrip], [Thumbnail], or [Photo Tray].
Saving adjusted images
- When selecting multiple images, adjustment settings will apply to all images. If selected images include ones unavailable for the adjustments, only available ones will be adjusted.
- If you select another image or perform another operation before clicking , a save confirmation dialog appears. Click [Yes] to save the adjustment settings to the adjustment file.
- If you click after having adjusted an image while editing its metadata on the [Adjustments/Metadata] palette, the edited metadata is also saved.
- For details on editing metadata, refer to "Editing Metadata".
Saving the image with a different name
When you have adjusted only one image, you can save it with a different name. Clicking  will display a window for setting the save destination and file name.
will display a window for setting the save destination and file name.Restoring the previous condition of an image
An adjusted and saved image can be reverted to the state before it was edited or when it was shot. For details, refer to "Reverting Adjusted Images".
About correction of color aberration
ViewNX-i can correct color aberration caused by the lens. Color aberration is a phenomenon of color fringing or color shift that occurs when light of different wavelengths passes through the lens at different angles of refraction to the subject. There are axial color aberration and lateral color aberration.
- Axial color aberration is a phenomenon that causes a position shift of an image as a result of differences in light wavelength.
- For details on correcting axial color aberration, refer to "Correcting Axial Color Aberration".
- Lateral color aberration is a phenomenon that causes size discrepancies in a captured image. By lateral color aberration, color shift occurs on the side of an object that is positioned away from the center of the image.
- For details on correcting lateral color aberration, refer to "Correcting Lateral Color Aberration".
Adjusting Smart Photo Selector images
- When
 is selected, adjustment is made to the key image only.
 - When
 is selected, adjustment is made to the selected image only.
 - When
 is selected, adjustment is made to RAW images (NEF, NRW) only.
Notes
- [Exposure Comp.], [White Balance] and [Picture Control] are applicable only to RAW images (NEF, NRW).
- The adjustment functions other than those named above are applicable to RAW (NEF, NRW), JPEG and TIFF images.
- Depending on the conditions, even images in supported file formats may not be edited by ViewNX-i. For details, refer to "Supported Formats".