- Home
- Adjusting Images
- White Balance (RAW images only)
Font size
- S
- M
- L
White Balance (RAW images only)
You can adjust the white balance of RAW (NEF, NRW) images.
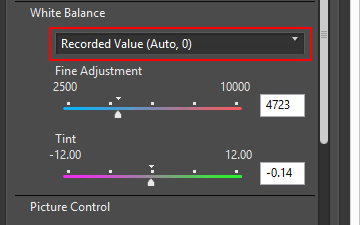
- Click
 of [White Balance], and select the desired item.
 White Balance is adjusted based on the selected items. For details on available items, refer to "Items selectable for White Balance and values for Color Temperature".When selecting [Use Gray Point], refer to "Use Gray Point".
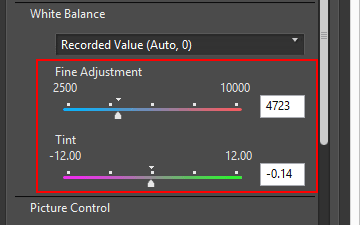
- Drag the [Fine Adjustment] or [Tint] slider to specify the fine adjustment values.
 White Balance is adjusted based on the specified values.
- To adjust color temperatures, drag the [Fine Adjustment] slider. Available values vary depending on the selected white balance. For details, refer to "Items selectable for White Balance and values for Color Temperature".
- To adjust tint, drag the [Tint] slider. You can set a value from -12 to 12. Setting a positive value makes magenta lighter (green deeper), and setting a negative value makes green lighter (magenta deeper).
- You can also specify the value by entering a numeric value in the input box.
Items selectable for White Balance and values for Color Temperature
- Recorded Value
- White balance is set to the value recorded.
- Calculate Automatically
- White balance is adjusted automatically based on the RAW image with ViewNX-i.
- When adjusting color temperature using [Fine Adjustment], the default value and the available range are automatically set. When selecting multiple RAW images (NEF, NRW), you cannot adjust color temperature using [Fine Adjustment].
- [Calculate Automatically] is not available for NEF format RAW images shot by COOLPIX cameras (except the COOLPIX A).
- Auto0
- Tone is automatically adjusted with an emphasis on white color expression.
- The suitability of the adjustments made by ViewNX-i depends on the camera that shot the image.
- If multiple images are selected and [Auto0] is not available for one or more of the selected images or files, [Auto0] becomes unavailable to all of the selected images or files.
- Auto1
- Regardless of the light source, ViewNX-i automatically adjusts the color tone for most images.
- The suitability of the adjustments made by ViewNX-i depends on the camera that shot the image.
- If multiple images are selected and [Auto1] is not available for one or more of the selected images or files, [Auto1] becomes unavailable to all of the selected images or files.
- Auto2
- ViewNX-i automatically adjusts the color tone to keep the warmth of the light bulb color, based on the RAW image taken under incandescent lighting.
- The suitability of the adjustments made by ViewNX-i depends on the camera that shot the image.
- If multiple images are selected and [Auto2] is not available for one or more of the selected images or files, [Auto2] becomes unavailable to all of the selected images or files.
- Natural Light Auto
- Optimizes white balance for natural light, including sunlight, cloud, and shade.
- This setting may not be applicable depending on the camera that shot the image.
- Incandescent
- Suited to photos taken under incandescent lighting.
- Color temperature: 3000K
- Available color temperature range: 2610K - 3533K
- Standard Fluorescent (3000K) / Standard Fluorescent (3700K) / Standard Fluorescent (4200K) / Standard Fluorescent (5000K) / Standard Fluorescent (6500K) / Standard Fluorescent (7200K)
- Suited to standard fluorescent lighting.
- Color temperature: 3000K / 3700K / 4200K / 5000K / 6500K / 7200K
- Available color temperature range: 2610K - 3533K / 3125K - 4545K / 3472K - 5319K / 4000K - 6666K / 4926K - 9090K / 5319K - 9090K
- High Color Rendering Fluorescent (3000K) / High Color Rendering Fluorescent (3700K) / High Color Rendering Fluorescent (4200K) / High Color Rendering Fluorescent (5000K) / High Color Rendering Fluorescent (6500K)
- Suited to high color rendering fluorescent lighting.
- Color temperature: 3000K / 3700K / 4200K / 5000K / 6500K
- Available color temperature range: 2610K - 3533K / 3125K - 4545K / 3472K - 5319K / 4000K - 6666K / 4926K - 9090K
- Direct Sunlight
- Suited to images taken in direct sun light.
- Color temperature: 5200K
- Available color temperature range: 2500K - 7042K
- Shade
- Suited to images taken in the shade on sunny days.
- Color temperature: 8000K
- Available color temperature range: 5714K - 9090K
- Cloudy
- Suited to images taken under overcast skies.
- Color temperature: 6000K
- Available color temperature range: 4629K - 8620K
- Flash
- Suited to images taken with Nikon Speedlights.
- Color temperature: 5400K
- Available color temperature range: 4255K - 7407K
- FL-G1
- Suited to images taken using a Nikon Speedlight with a filter for fluorescent light (FL-G1, SZ-3FL) attached.
- Color temperature: 5464K
- Available color temperature range: 4301K - 7553K
- FL-G2
- Suited to images taken using a Nikon Speedlight with a filter for fluorescent light (FL-G2) attached.
- Color temperature: 5988K
- Available color temperature range: 4610K - 8562K
- TN-A1
- Suited to images taken using a Nikon Speedlight with a filter for incandescent/tungsten light (TN-A1, SZ-3TN) attached.
- Color temperature: 2445K
- Available color temperature range: 2180K - 2789K
- TN-A2
- Suited to images taken using a Nikon Speedlight with a filter for incandescent/tungsten light (TN-A2) attached.
- Color temperature: 5000K
- Available color temperature range: 4000K - 6622K
- Sodium-vapor Lamps
- Suited to images taken in places such as baseball stadiums or gymnasiums where sodium-vapor light is used.
- Color temperature: 2700K
- Available color temperature range: 2380K - 3125K
- Underwater
- Suited to images taken underwater.
- [Underwater] is available only for RAW images taken with cameras that support [Underwater].
- If multiple images are selected and [Underwater] is not available for one or more of the selected images or files, [Underwater] becomes unavailable to all of the selected images or files.
- Use Gray Point
- When selecting [Use Gray Point], refer to "Use Gray Point".
Use Gray Point
Selecting [Use Gray Point] in [White Balance] enables you to specify a gray part on an image and adjust White Balance based on the RGB value. Gray point samples can be taken only from selected RAW images (NEF, NRW).
- Select [Use Gray Point] in [White Balance].
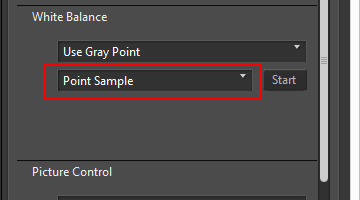
- Click
 and select the sampling range.
 You can select the sampling range for specifying the gray point on the image from [Point Sample], [3x3 Average] or [5x5 Average].
- Click [Start].
The cursor will change to the dropper tool.
- Click a gray part of the image.
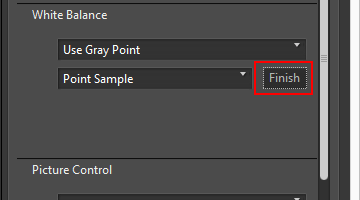
You can re-specify a gray point any number of times until you click [Finish]. Zooming in an image enables you to specify a gray point in detailed areas. To zoom an image, refer to "Resizing View".When editing a RAW image, you can also specify a gray point by clicking the thumbnail.To exit the dropper tool without adjusting [White Balance], click [Finish] without specifying any gray point, or click a part other than an image or thumbnail.
- Click [Finish].
 [White Balance] is adjusted using the gray point.
