The NX Studio Window
The elements of the NX Studio window are shown below.
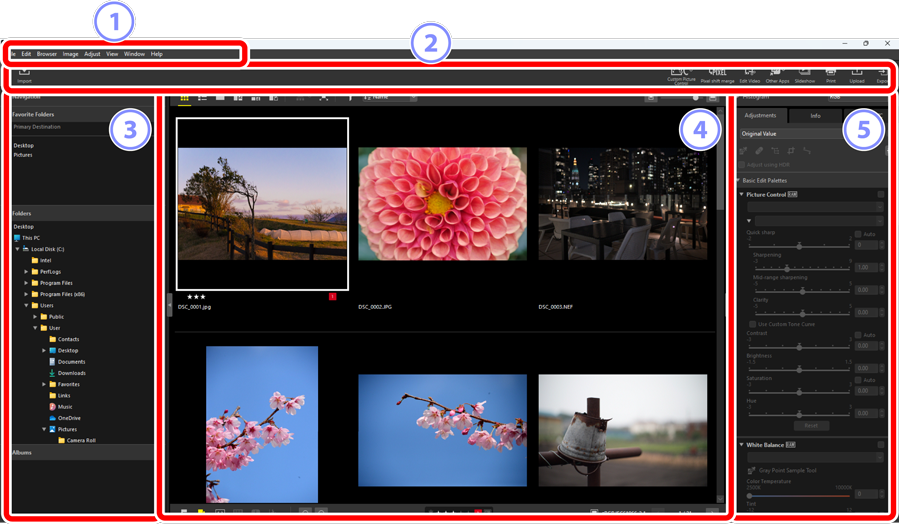
 The Menu Bar
- Select menu options.
 The Toolbar
- Launch Nikon Transfer 2 or other software, print pictures, or perform other tasks.
 The Browser Palette
- Select folders in the [Folders] list, view frequently-used folders you’ve added to [Favorite Folders], or browse [Albums], personalized collections of frequently-viewed photos.
 The View Area
- Pictures are displayed here (0 The View Area).
 The Adjustments/Info Palette
- Shows image information and adjustments for the selected pictures.
The Toolbar
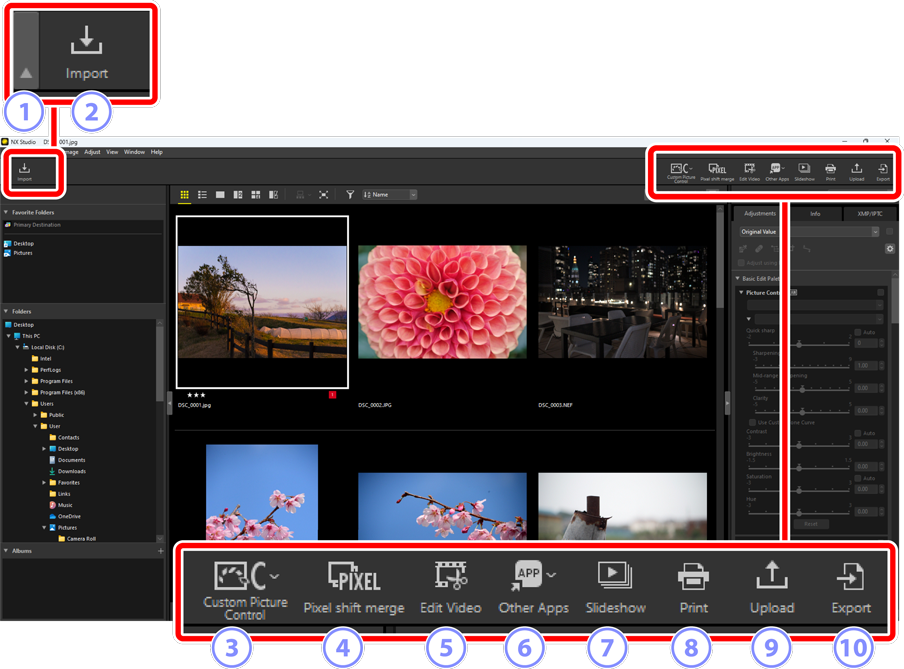
- View/Hide Toolbar
- Click to view or hide the toolbar.
- [Import]
- Launch Nikon Transfer 2.
- [Custom Picture Control]
- Import or export Custom Picture Control files (0 Importing/Exporting Custom Picture Control Files).
- [Pixel shift merge]
- Merge a sequence of pictures taken using pixel shift into a single file (0 Merge Pictures Taken Using Pixel Shift).
- [Edit Video]
- Click to launch the preset video editing software. The software included in your operating system is set by default. You can change the software via [Open with Application] in the options dialog (0 The Options Dialog, [Open with Application]).
 [Other Apps]
- Open selected pictures using other software. Software can be added via [Open with Application] in the options dialog (0 The Options Dialog, [Open with Application]).
 [Slideshow]
- View the pictures in the current selection or current folder as a slide show (0 Viewing Selected Pictures).
 [Print]
- Print the pictures in the current selection (0 Printing Pictures).
 [Upload]
- Upload the pictures in the current selection to NIKON IMAGE SPACE (0 Web Services, NIKON IMAGE SPACE).
 [Export]
- Export the pictures in the current selection in JPEG, HEIF, or TIFF format. Options available during export include resizing pictures and removing image information (0 Saving Pictures in Other Formats).
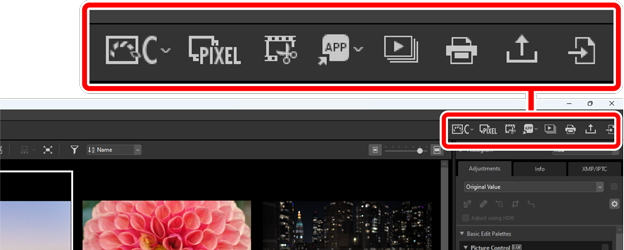
Toolbar Display Options
To display the tools in the toolbar as icons without text, select [Customize Toolbar] > [Icon only] in the [Window] menu. Use [Customize] to choose the tools displayed.
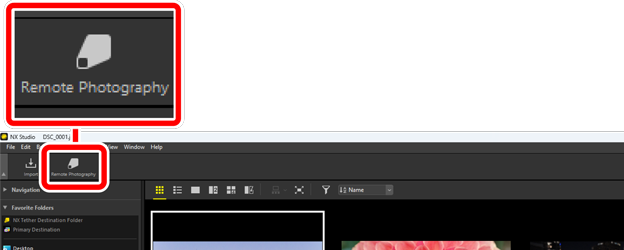
If installed, NX Tether can be launched by clicking [Remote Photography] in the toolbar.
Opening Pictures in Other Applications
Use [Other Apps] to open copies of the pictures in the current selection in other applications.
- The destination to which the copies are saved can be selected using [Open with Application] in the options dialog (0 The Options Dialog, [Open with Application]).
The format in which the copies are saved can be selected in a dialog displayed after you have chosen the desired application.
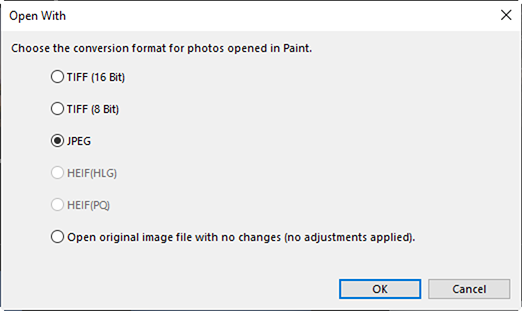
- [TIFF (16 Bit)]/[TIFF (8 Bit)]/[JPEG]: The pictures will be saved and opened in the selected format with any enhancements applied in NX Studio intact. Choose [TIFF (16 Bit)] to open NEF (RAW) pictures or merged pixel shift pictures (NEFX files) in the destination application with no drop in quality.
- [HEIF (HLG)]/[HEIF (PQ)]: Available only in the case of pictures recorded in HLG on cameras that support tone-mode selection.
- After choosing an application, you may be prompted to install a codec (Windows only). Follow the on-screen instructions.
- [Open original image file with no changes (no adjustments applied)]: The files will be opened in their original formats. Enhancements made in NX Studio will not be applied.
- The pictures will not open if the chosen format is not supported in the selected application.
- Click [OK] to save the pictures in the selected format and open them in the chosen application.
The Browser Palette
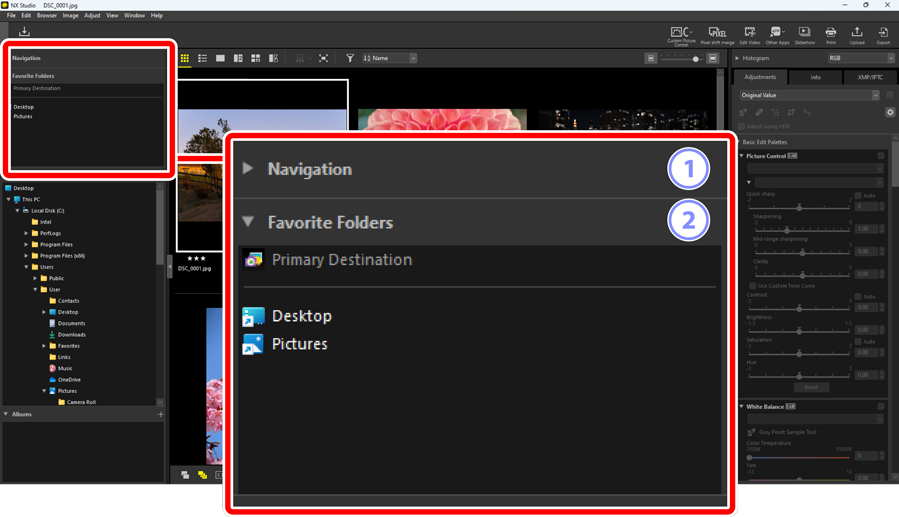
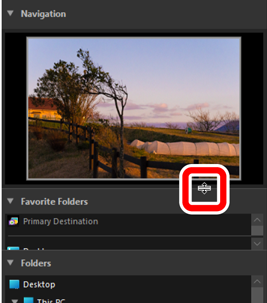
- [Navigation]
A small image showing pictures displayed in the view area in single- or multi-frame view.
- A frame shows the area visible when the picture is zoomed in.
- Drag the frame to scroll the display in the view area to a different area of the image.

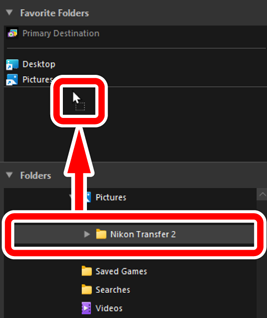
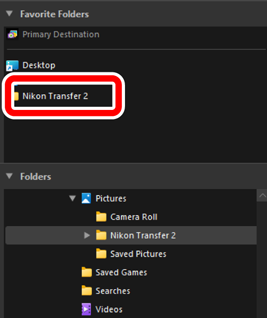
- [Favorite Folders]
Add folders to favorites by dragging them in from the [Folders] list.


- [Folders]
- A hierarchical display of the folders on the computer. Click folders to display the pictures they contain in the view area.
- [Albums]
- Create and manage albums. Use albums to organize pictures across folders (0 Collecting Pictures in Albums).
- View/Hide
- Click to view or hide the browser palette.
Viewing and Hiding Sub-Palettes
The [Navigation], [Favorite Folders], [Folders], and [Albums] sub-palettes can be viewed or hidden by clicking the  /
/ buttons at their top left corners.
Resizing Sub-Palettes
Drag the borders between the [Navigation], [Favorite Folders], [Folders], and [Albums] sub-palettes to adjust their size.

Collecting Pictures in Albums
Organize pictures by theme. Using albums to collect pictures from multiple folders can help you quickly find the shot you want.
To create a new album, click
 and enter the album name.
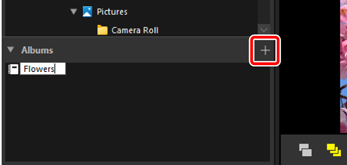
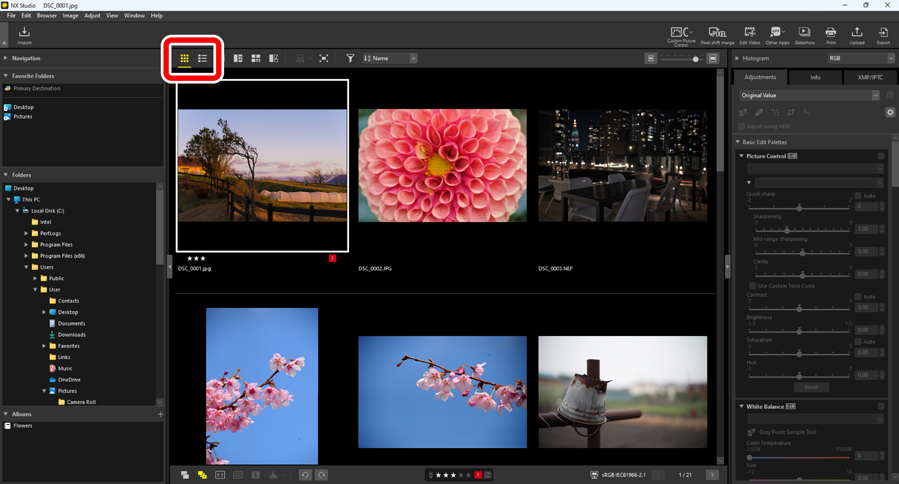
Display the filmstrip (0 Filmstrip View) or select the thumbnail grid or thumbnail list view in the view area (0 Choosing a View Mode).
Drag and drop pictures into the album created in Step 1.
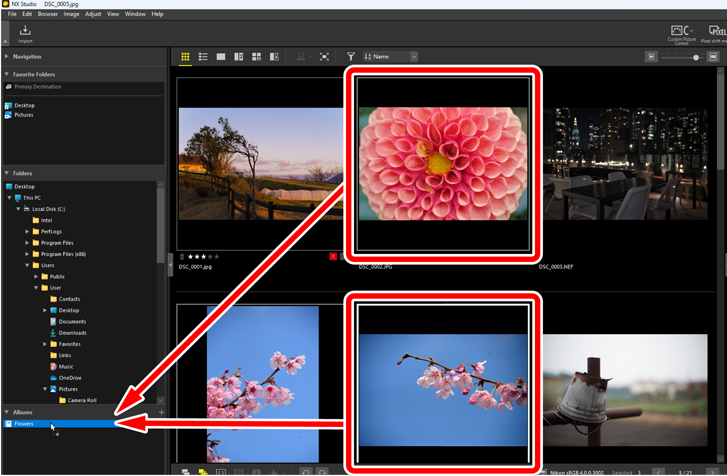
Selecting Multiple Pictures for Drag-and-Drop
Multiple pictures can be selected for drag-and-drop using the control (or in macOS, the command) or shift key.
Add pictures from other folders.
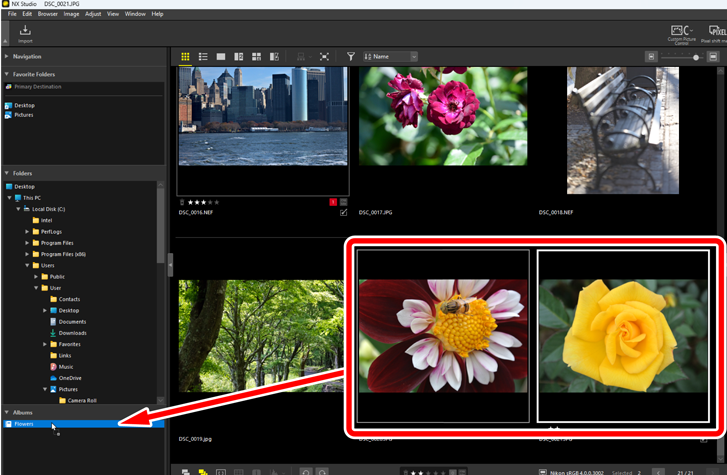
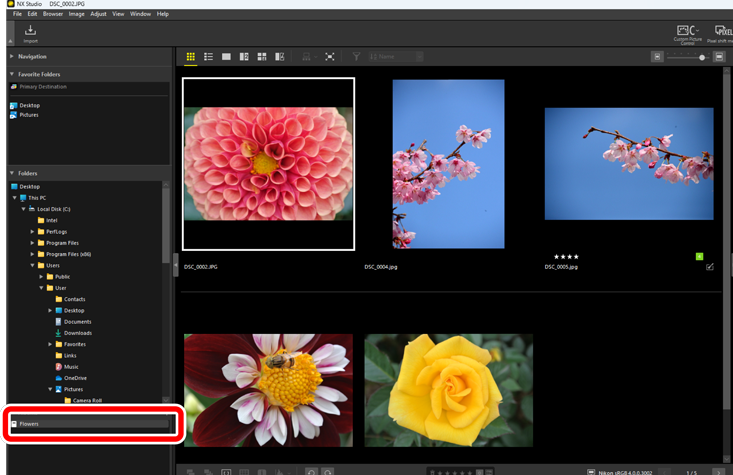
Click the album name to view the pictures added to the album in Steps 3 and 4.
Albums
- Folders cannot be created in albums.
- Albums do not support sort or filter operations.
- Pictures in albums are stored in their original folders and are not copied or moved into the albums.
- To delete an album, right-click (or in macOS, control-click) the album and select [Delete Album].
The Adjustments/Info Palette
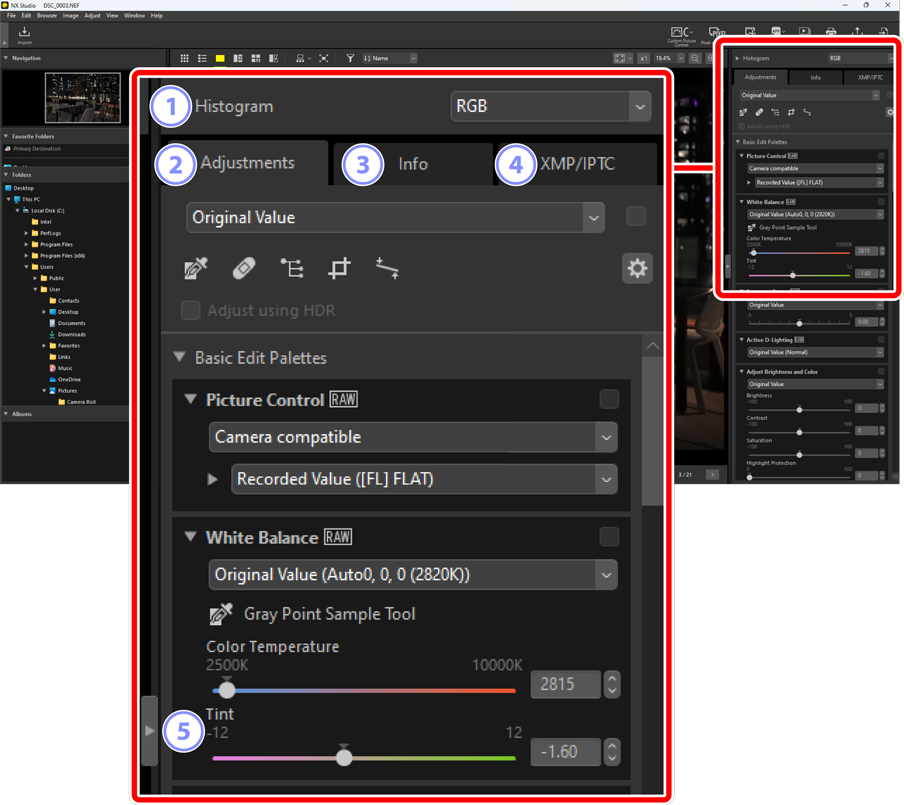
- [Histogram]
The histogram for the current picture. To view or hide the histogram, click the
/ button.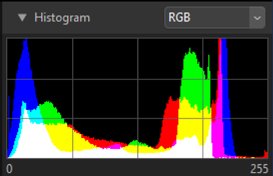
The channel and brightness can be selected from the pull-down menu.
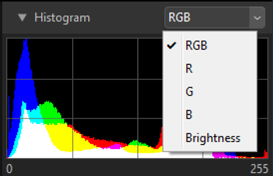
- Select [RGB] to display the histograms for all three channels, [R] (red), [G] (green), and [B] (blue), overlaid with each other. Regions where the histograms overlap are shown in other colors. [G] and [B] overlaps are shown in cyan, [R] and [B] overlaps in magenta, and [R] and [G] overlaps in yellow. Regions where all channels overlap are shown in white.
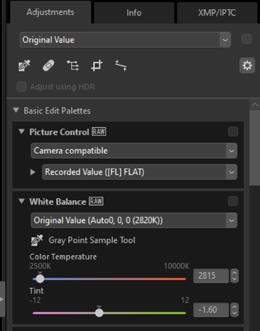
- The [Adjustments] Tab
Enhance the current picture. Among the many adjustments on offer are cropping and straightening tools and tools for adjusting such parameters as exposure, white balance, and brightness (0 The Adjustments Tab).
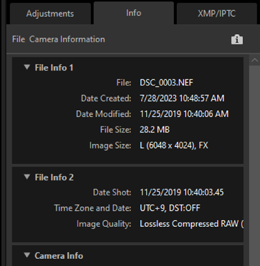
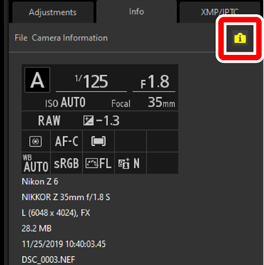
- The [Info] Tab
View information on the current picture, including the camera model name, date of recording, and exposure. The picture’s upload date and time is also displayed if uploaded from the camera to an FTP server.
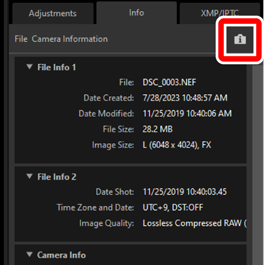
View Mode
The display in the [Info] tab changes with each press of the view mode button.


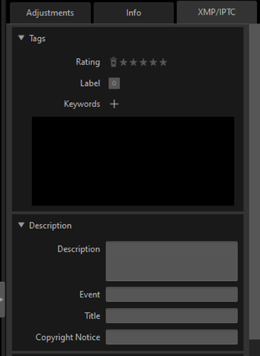
- The [XMP/IPTC] Tab
Edit XMP/IPTC metadata, including labels and ratings. Changes to labels and ratings in the view area or [Image] menu are reflected in the [XMP/IPTC] tab.
- View/Hide
- Click to view or hide the adjustments/info palette.