- Camera Control Pro 2 Help
- The Camera Menu
The Camera Menu
The Camera menu contains the following options:
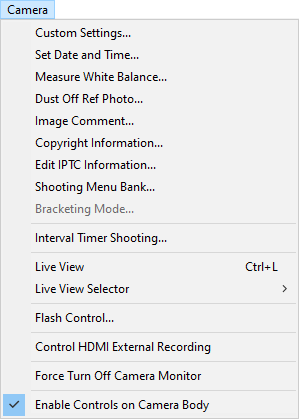
- Custom Settings (D780 / D750 / D610 / D600 / D7500 / D7200 / D7100 / D5600 / D5500 / D5300 / D5200 / D5100 / Df / Z 5 / Z 50 / Nikon 1 V3 excluded)
- Selecting this option opens the Custom Settings dialog, where camera Custom Settings can be adjusted.
- Set Date and Time
-
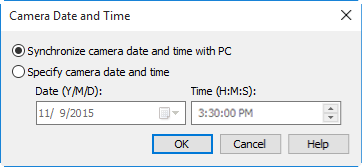
Selecting this option opens the dialog shown below, where you can set the camera's clock calendar to the current date and time. Select Synchronize camera date and time to PC to synchronize the camera clock with the computer, or Specify camera date and time to set the camera clock manually. Click OK to set the clock calendar to the time and date shown.
- Measure White Balance
-
Use this option to measure preset manual white balance. If the camera currently connected supports multiple values for preset manual white balance, settings can be protected and the setting that will be used to store the measured value can be chosen from the pop-up menu at the top of the dialog (D5600, D5500, D5300, D5200, D5100, D5000, and Nikon 1 V3 excluded). Adjust camera settings as described in the section on preset manual white balance in the camera user’s manual and click OK to measure a value for white balance.

Nikon 1 V3 (dialogs for other cameras may differ)
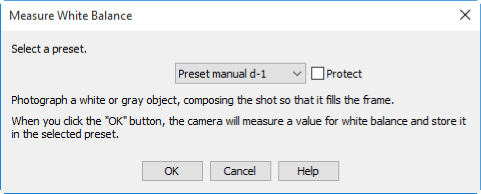
D6 (dialogs for other cameras may differ)
Choosing a Mode (D780 / D750 / D610 / D600 / D90 / D7500 / D7200 / D7100 / D7000 / D5600 / D5500 / D5300 / D5200 / D5100 / D5000 / Z 50)
The Measure White Balance option is only available in P, S, A, and M modes.
- Dust Off Ref Photo (Nikon 1 V3 excluded)
-
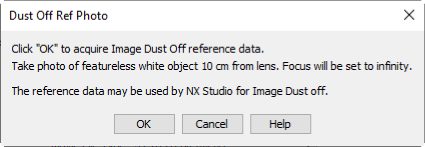
Choose this option to take a reference photo for the Image Dust Off option in NX Studio and other Nikon software. The dialog shown below will be displayed. With the camera lens ten centimeters (four inches) from a featureless white object, frame the object so that it fills the display and click OK to record an Image Dust Off reference photo. See the camera manual for details.
- Image Comment (Nikon 1 V3 excluded)
-
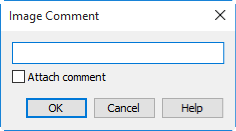
Selecting this option displays the dialog shown below, where you can enter a comment or title for subsequent photographs. The title will be used for all subsequent photographs taken while the camera is connected. When the camera is connected, the title is stored in the camera as an image comment of thirty-six characters or less which is appended to photographs only when the Attach comment box is checked.
- Edit Copyright Information (all cameras except the D3 prior to firmware version 2.00, the D300 prior to firmware version 1.10, and the D90, D5300, D5200, D5100, D5000, and Nikon 1 V3)
-
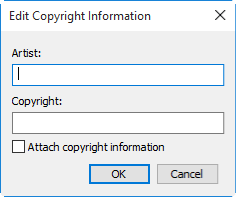
Selecting this option displays the dialog shown below, where you can enter photographer and copyright holder names for subsequent photographs. This information is appended to photographs only when Attach copyright information is selected.
- Edit IPTC Information (D6 / D5 / D500 / Z 9 / Z 8)
-
Selecting this option displays a dialog where you can edit, save, or delete IPTC presets. To embed the IPTC information stored in the preset selected in the IPTC Preset field, select Auto embed during shooting.
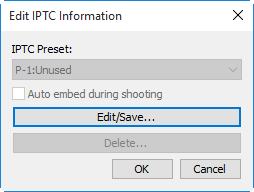
To edit or save IPTC presets, click Edit/Save and choose a preset in the “Select Preset to Edit or Save” dialog.
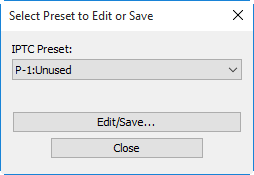
After choosing a preset, click Edit/Save and enter IPTC information.
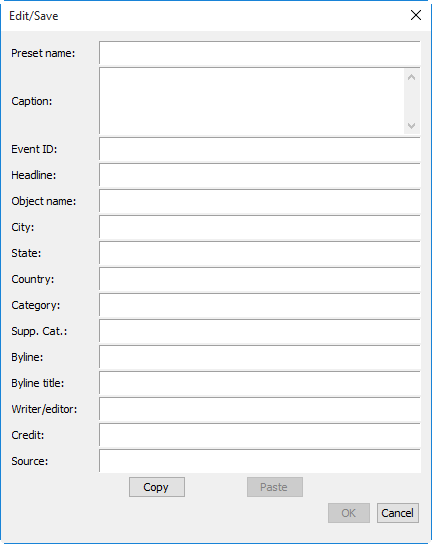
The D6, Z 9, and Z 8 offer a choice of IPTC presets (P-11 through P-13).
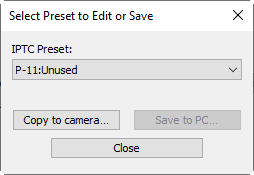
XMP/IPTC presets created in other applications and saved in XMP format can be copied to the camera by clicking Copy to camera. If slots P-11 through P-13 are currently full, XMP/IPTC presets can instead be saved to the computer by clicking Save to PC.
- Shooting Menu Bank (D6 / D5 / D4 series / D3 series / D850 / D810 / D810A / D800 / D800E / D700 / D500 / D300 series / Df / Z 9 / Z 8)
-
Selecting this option displays the dialog shown below, where you can choose the shooting menu bank in which changes to settings will be stored while the camera is controlled from Camera Control Pro 2. See the camera manual for details.
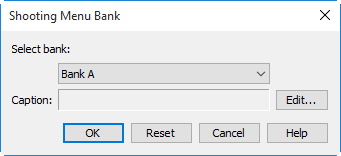
A descriptive comment can be added to the name of each shooting menu bank. Clicking Edit displays the dialog shown below, where the comments for each bank can be edited. Click OK to copy the comments to the camera.
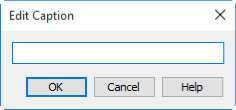
Edit Comment dialog
- Bracketing Mode (Nikon 1 V3 excluded)
- Selecting this option displays the BKT Mode dialog. See “Bracketing” for details.
- Interval Timer Shooting
- Selecting this option opens the “Interval Timer Shooting” dialog.
- On-camera interval-timer photography (Z 9 / Z 8)
- Selecting this option displays an “Interval-timer photography (on-camera)” dialog, where you can start and end interval-timer photography. Pictures will be taken at the settings currently in effect on the camera. See “On-Camera Interval-Timer Photography” for details.
- On-camera focus-shift photography (Z 9 / Z 8)
- Selecting this option displays a “Focus-shift photography (on-camera)” dialog, where you can start and end focus-shift photography. Pictures will be taken using the interval and other focus-shift settings currently in effect on the camera.
- Live View
- Selecting this option opens the live view window and enables live view. Select this option again to close the live view window.
- Live View Selector (D6 / D5 / D4 series / D850 / D810 / D810A / D800 / D800E / D780 / D750 / D610 / D600 / D500 / D7500 / D7200 / D7100 / Z 9 / Z 8 / Z 7II / Z 6II / Z 7 / Z 6 / Z 5 / Z 50 / Nikon 1 V3)
- Choose from live view photography and movie live view. In the case of the D4, this option is not available during live view or when Enable Controls on Camera Body is selected.
- Flash Control (D6 / D5 / D850 / D780 / D500 / Z 9 / Z 8 / Z 7II / Z 6II / Z 7 / Z 6 / Z 5)
- Selecting this option displays the flash control window. See “Flash Control” for more information. This option is available only when Flash Control is active in the camera photo shooting menu, namely when a compatible flash unit such as the SB-5000 is mounted on the accessory shoe or a WR-R10, WR-R11a, or WR-R11b is connected. For more information on connecting flash units, see the documentation for the camera and supported flash units.
- Control HDMI External Recording (D6 / D850 / Z 9 / Z 8 / Z 5)
- If this option is selected when a device is connected via HDMI, recording to the device will begin and end when movie recording begins and ends on the camera.
- HDMI (D780 / Z 7II / Z 6II / Z 7 / Z 6)
- Selecting this option displays an HDMI dialog (see “HDMI”). HDMI takes effect whenever HDMI can be selected in the setup menu for the connected camera.
- Force Turn Off Camera Monitor (D6 / D780 / Z 9 / Z 8 / Z 7II / Z 6II / Z 5)
- Selecting this option turns the camera monitor off.
- Enable electronic shutter (Z 9 / Z 8)
- Select this option to play a sound when the shutter is released.
- Enable Controls on Camera Body (Nikon 1 V3 excluded)
- Check this option to enable camera controls, allowing settings to be adjusted and photographs taken directly from the camera. If this option is not checked, only the power switch and focus-mode selector can be used.
Text Entry
Text entry fields can contain letters, numbers, quotes, apostrophes, spaces, and any of the following characters: “,” “.” “!” “?” “#” “$” “%” “&” “(” “)” “[” “]” “{” “}” “*” “+” “-” “/” “:” “;” “<” “=” “>” “_” and “@”. IPTC presets as well as comments and copyright information for the D6, D5, D850, D500, and D7500 may also include “\” “^” “`” “|” and “~”.
IPTC Presets
IPTC preset names can be up to 18 characters long. The maximum number of characters that can be entered in each field is shown below.
| Field | Maximum length |
|---|---|
| Caption | 2000 |
| Event ID | 64 |
| Headline | 256 |
| Object name | 256 |
| City | 256 |
| State | 256 |
| Country | 256 |
| Category | 256 (Z 9 firmware version 4.00 or later and Z 8 firmware version 2.00 or later) or 3 (all other cameras, including Z 9 and Z 8 cameras with earlier firmware) |
| Supp. Cat. | 256 |
| Byline | 256 |
| Byline title | 256 |
| Writer/editor | 256 |
| Credit | 256 |
| Source | 256 |
