Interval Timer Shooting
Using Camera Control Pro 2, you can take a series of photographs automatically at a time interval you select. Interval timer shooting options can be accessed via Interval Timer Shooting in the Camera menu. In the case of the Z 9 or Z 8, Camera Control Pro 2 offers an On-camera interval-timer photography option that can be used to take pictures using the interval-timer photography settings selected on the camera.
Interval Timer Shooting
Camera Control Pro 2 can be configured via Interval Timer Shooting in the Camera menu to take a selected number of shots at a preset interval using the settings currently selected on the camera or in Camera Control Pro 2’s various settings tabs.
Note:
The interval timer shooting is not available when:
- pictures are being transferred,
- live view shooting is in progress (D6 / D780 / Z 9 / Z 8 / Z 7II / Z 6II / Z 7 / Z 6 / Z 5 / Z 50 / Nikon 1 V3 excluded),
- the camera is in video mode (Z 9 / Z 8),
- a movie is being recorded,
- HDR mode is enabled (D5600 / D5500 / D5300 / D5200 / D5100) or set to On (single photo) (D6 / D5 / D4 series / D850 / D810 / D810A / D800 / D800E / D780 / D750 / D610 / D600 / D500 / D7500 / D7200 / D7100 / Df / Z 9 / Z 8 / Z 7II / Z 6II / Z 7 / Z 6 / Z 5 / Z 50),
- Time is selected for Shutter speed in the “Exposure 1” tab (D6 / D5 / D4S / D850 / D810 / D810A / D780 / D750 / D500 / D7500 / D7200 / D7100 / D5600 / D5500 / D5300 / Df / Z 9 / Z 8 / Z 7II / Z 6II / Z 7 / Z 6 / Z 5 / Z 50),
- Active Selection is chosen for Best moment capture in the “Exposure 1” tab (Nikon 1 V3), or
- Slow motion is chosen for Advanced Movie Mode in the “Movie” tab (Nikon 1 V3).
-
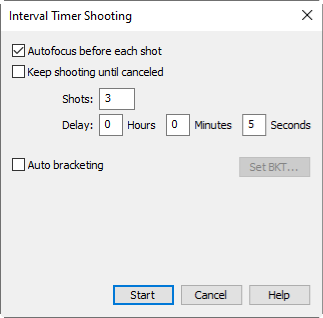
Select Interval Timer Shooting from the Camera menu. The Interval Timer Shooting dialog will be displayed.
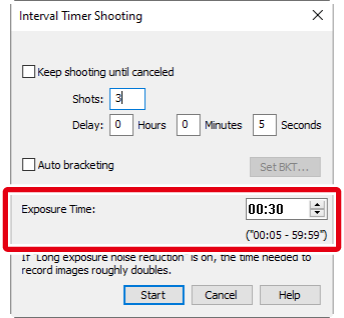
Bulb Photography Exposure Time (D3 Series / D700 / D300 Series / D90 / D7000 / D5100 / D5000 Excluded)
The following dialog is displayed when “Bulb” is selected for shutter speed. Choose an exposure time.
-
Before shooting starts, adjust the following settings:
-
Click Start. New photographs will be processed according to the option selected for When a new image is received from the camera in the “Transfer Options” dialog.
-
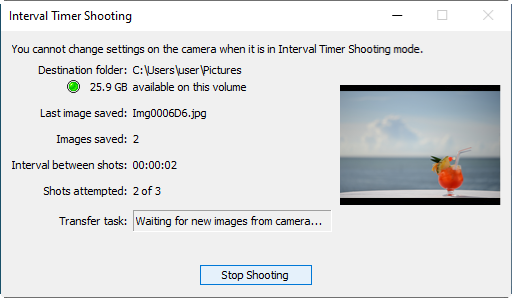
Follow the progress of interval timer shooting in the progress dialog.
Click Stop Shooting to end interval timer shooting at any time. If a number of shots was specified in the “Interval Timer Shooting” dialog, shooting will end when the specified number of shots has been taken.
- Once the specified number of shots has been taken, the Stop Shooting button will change to Shooting Complete. Click Shooting Complete to exit the “Interval Timer Shooting” dialog.
Time Interval Settings
If the delay is shorter than the time required to record each photograph, the actual interval between photographs will be longer than that specified in the “Interval Timer Shooting” dialog.
IMPORTANT
No operations can be performed in the “Camera Control Pro” window until the “Interval Timer Shooting” dialog is closed.
During Interval Timer Shooting
Camera controls cannot be used while interval timer shooting is in progress.
Error Logs
If an error occurs during shooting, an error log will be displayed; click OK to close the log and return to the Camera Control Pro 2 window.
Hard Disk Full
The download folder indicator in the “Interval Timer Shooting” dialog changes from green to yellow to red as the destination fills. If necessary, suspend shooting and change the destination drive.
![]()
“On-Camera Interval-Timer Photography” (Z 9 / Z 8)
To perform interval-timer photography using the interval-timer photography settings currently in effect on the camera, use On-camera interval-timer photography in the Camera menu. Camera Control Pro 2 serves only to start, stop, and end interval-timer photography.
Notes:
- On-camera interval-timer photography will not be available if:
- a retractable lens is attached but not extended,
- the camera is recording a value for spot white balance or in direct measurement mode,
- the camera is in video mode,
- Bulb or Time is selected for Shutter Speed in the Exposure 1 tab,
- C15 (Z 9 firmware version 5.00 or later), C30, C60 (for Z 9, firmware version 3.00 or later), or C120 is selected for Release Mode in the Mechanical tab,
- Auto bracketing is enabled in the Mechanical tab,
- an option other than Off is selected for HDR Mode in the Image Processing tab, or
- you are using an older version of the FTZ mount adapter firmware.
- The pictures will be saved to the destination selected for Record to in the Storage tab. The destination cannot be changed while interval-timer photography is in progress.
- If a connection to Camera Control Pro 2 is established while interval-timer photography is in progress, the remaining pictures will be saved to the camera memory card.
- When PC or PC + CARD is selected for Record to in the Storage tab, interval-timer photography will end if the connection to the camera is lost while interval-timer photography is in progress. Shooting will continue uninterrupted if CARD is selected.
-
Adjust interval-timer photography settings on the camera. For details, see the documentation provided with the camera.
-
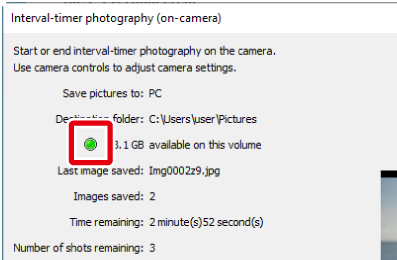
Select On-camera interval-timer photography in the Camera menu to display the “Interval-timer photography (on-camera)” dialog.
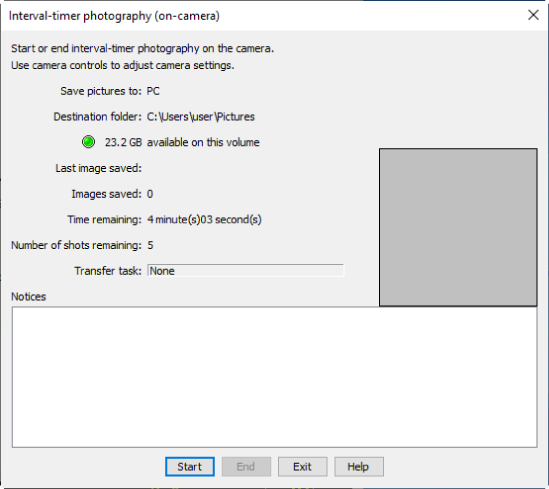
-
Click Start to start interval-timer photography using the settings currently selected on the camera. Progress is shown in the interval-timer photography dialog. To end interval-timer photography, click End.
-
Click Exit to close the dialog when shooting is complete. To exit earlier, click End before clicking Exit.
IMPORTANT
No operations can be performed in the “Camera Control Pro” window until the “Interval Timer Shooting (on-camera)” dialog is closed.
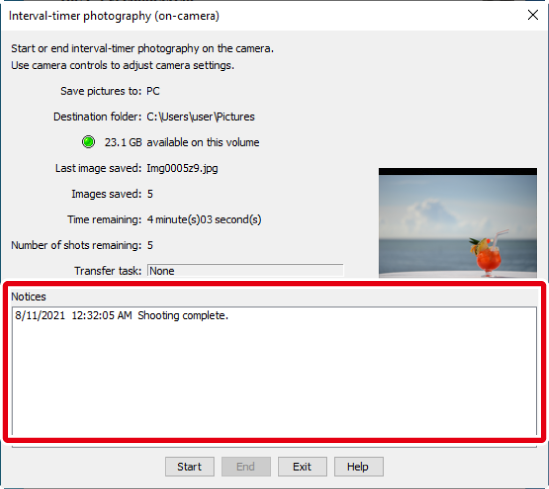
“Notices”
A message is displayed in the “Notices” pane of the “Interval-timer photography (on-camera)” dialog when shooting ends, whether because interval-timer photography is complete or a problem has arisen.
Hard Disk Full
The download folder indicator in the “Interval-timer photography (on-camera)” dialog changes from green to yellow to red as the destination fills. If necessary, suspend shooting and change the destination drive.