Connecting the Camera to the Smart Device Wirelessly (Supported Cameras Only)
Supported Cameras
This feature is available with:
- Z9 cameras (“C” firmware version 5.00 or later)
- Z8 cameras (“C” firmware version 3.00 or later)
- Z6III cameras
- Z5II cameras
- Zf cameras (“C” firmware version 3.00 or later)
- Z50II cameras
- ZR cameras
The Settings App Menu Path
The path of the settings app menu used to connect wirelessly varies with the version of the operating system you are using.
To establish a wireless connection between the camera and the smart device, you can either connect both devices to the same wireless LAN access point, or you can use the smart device as an access point.
- When establishing a wireless connection between the camera and the smart device in camera's AP mode, NX MobileAir's wireless connections are disabled.
- The smart device can still connect to the Internet while wirelessly connected to the camera.
- The devices cannot be connected wirelessly while a wired connection is active. Unplug the USB cable before starting a wireless connection. If you connect the camera to the smart device via USB while a wireless connection is active, the wireless connection will be disconnected, and the wired connection will become active.
- Cameras cannot be connected to NX MobileAir while connected to other applications like SnapBridge. Disconnect the camera from any other applications before connecting to NX MobileAir wirelessly.
Connecting the Camera and the Smart Device via Wireless LAN Access Point
Connect the camera and the smart device via the same wireless LAN access point.
-
Smart Device: Connect the smart device to an existing network via Wi-Fi in the operating system’s settings app.
- For details, refer to the documentation provided with your smart device.
Camera: In the network menu, select [Connect to smart device], then select [Create profile] for [Wi-Fi connection (STA mode)] and press the OK button.
Camera: Select the SSID of the access point that a smart device is connected to and press the OK button.

Camera: Enter the encryption key.
The camera will connect to the existing network via Wi-Fi.
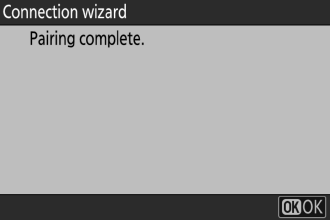
Camera: Select the IP address configuration method and press the OK button.
When the IP address has been acquired, a dialog indicating that the IP address has been configured will be displayed.
Smart Device: Launch NX MobileAir.
Smart Device: Tap the
 (wireless settings) button in the album list.
The Wi-Fi settings will be displayed.
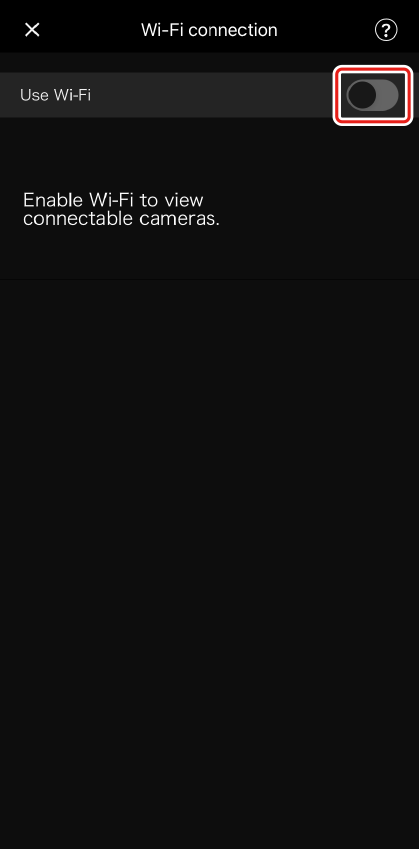
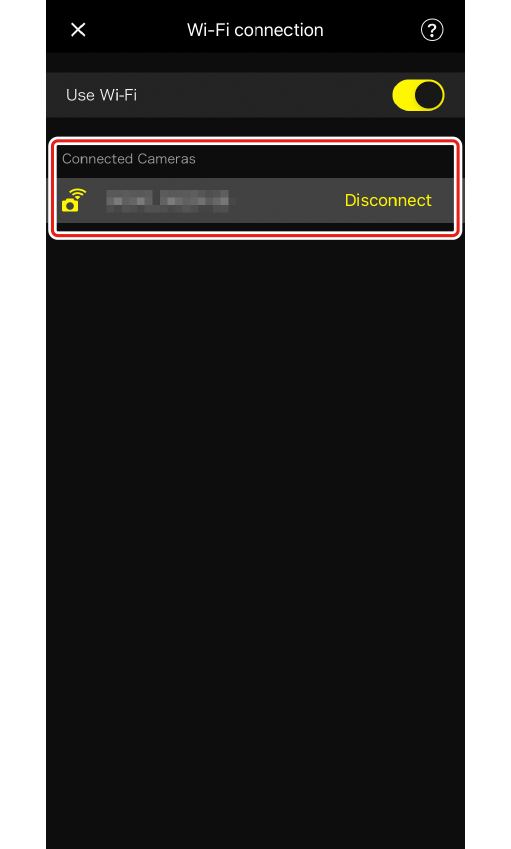
Smart Device: Enable [Use Wi-Fi].

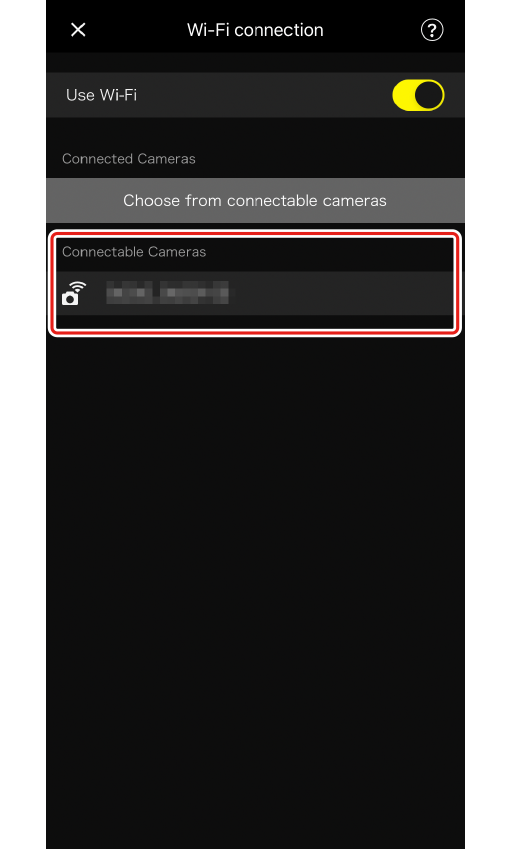
Smart Device: Tap the name of the camera you want to connect to in the [Connectable Cameras] list.


Camera: Press the OK button.
If the connection is successful, the camera name will be displayed in the [Connected Cameras] list.
- Cameras that have been connected to the smart device will appear on the [Saved Cameras] list when not connected.
- Tap [Delete] in [Connected Cameras] to disconnect the camera and remove it from [Connectable Cameras] and [Saved Cameras].
Subsequent Connections
When a camera that has been registered in [Saved Cameras] connects to the same wireless LAN access point to which the smart device is connected, it will automatically be added to NX MobileAir's [Connected Cameras]. If multiple cameras are available, the most recently connected camera will be connected. To connect a different camera, tap the name of the camera displayed in [Connectable Cameras].
Synchronizing Clocks
To automatically synchronize the camera clock with the smart device clock when connecting the two devices, select [App options], and enable [Sync clocks] (0App Options). Note that the camera clock will not be changed to the time zone selected on the smart device.
Connecting to the Camera Using the Smart Device as an Access Point
In places with no available wireless LAN network, such as locations outdoors, a wireless connection can be established between the camera and the smart device using the smart device as an access point (Wi-Fi tethering).
- A smart device with Wi-Fi tethering capability is required.
- USB and Bluetooth tethering cannot be used.
- Some mobile carriers impose restrictions or additional fees for tethering. For details, contact your service provider.
-
Smart Device: Enable tethering in the settings app for the smart device.
- The access point name and password displayed in the tethering settings are required to connect the camera.
Camera: In the network menu, select [Connect to smart device], then select [Create profile] for [Wi-Fi connection (STA mode)] and press the OK button.
Camera: Select the SSID of the smart device and press the OK button.
-
Camera: Enter the encryption key.
The camera will connect to the existing network via Wi-Fi.
Camera: Select the IP address configuration method and press the OK button.
When the IP address has been acquired, a dialog indicating that the IP address has been configured will be displayed.
-
Smart Device: Launch NX MobileAir.
Smart Device: Tap the
(wireless settings) button in the album list.The Wi-Fi settings will be displayed.
Smart Device: Enable [Use Wi-Fi].
Smart Device: Tap the name of the camera you want to connect to in the [Connectable Cameras] list.
Camera: Press the OK button.
If the connection is successful, the camera name will be displayed in the [Connected Cameras] list.
- Cameras that have been connected to the smart device will appear on the [Saved Cameras] list when not connected.
- Tap [Delete] in [Connected Cameras] to disconnect the camera and remove it from [Connectable Cameras] and [Saved Cameras].
The Automatic Access Point Disabling Function
If the setting to automatically turn the access point off is enabled on the smart device, the camera may disconnect from the smart device unexpectedly. When using Wi-Fi tethering, be sure to disable the setting to automatically turn the access point off.
- For details, refer to the documentation provided with your smart device.
- As disabling this setting will cause the device’s battery to drain more quickly, it is recommended that you use a fully charged smart device and a mobile battery or similar device.
Subsequent Connections
When a camera that has been registered in [Saved Cameras] connects to the access point of the smart device, it will automatically be added to [Connected Cameras]. If multiple cameras are available, the most recently connected camera will be connected. To connect a different camera, tap the name of the camera displayed in [Connectable Cameras].
Synchronizing Clocks
To automatically synchronize the camera clock with the smart device clock when connecting the two devices, select [App options], and enable [Sync clocks] (0App Options). Note that the camera clock will not be changed to the time zone selected on the smart device.
Supported Cameras
This feature is available with:
- Z9 cameras (“C” firmware version 5.00 or later)
- Z8 cameras (“C” firmware version 3.00 or later)
- Z6III cameras
- Z5II cameras
- Zf cameras (“C” firmware version 3.00 or later)
- Z50II cameras
- ZR cameras
Camera USB Settings
When connecting the camera to a smart device via a wireless connection, select [MTP/PTP] for [USB] in the camera network menu (or in the camera setup menu for the D6 and Z7II/Z6II).
The Settings App Menu Path
The path of the settings app menu used to connect wirelessly varies with the version of the operating system you are using.
To establish a wireless connection between the camera and the smart device, you can either connect both devices to the same wireless LAN access point, or you can use the smart device as an access point.
- When establishing a wireless connection between the camera and the smart device in camera's AP mode, NX MobileAir's wireless connections are disabled.
- The smart device can still connect to the Internet while wirelessly connected to the camera.
- Cameras cannot be connected to NX MobileAir while connected to other applications like SnapBridge. Disconnect the camera from any other applications before connecting to NX MobileAir wirelessly.
Connecting the Camera and the Smart Device via Wireless LAN Access Point
Connect the camera and the smart device via the same wireless LAN access point.
-
Smart Device: Connect the smart device to an existing network via Wi-Fi in the operating system’s settings app.
- For details, refer to the documentation provided with your smart device.
Camera: In the network menu, select [Connect to smart device], then select [Create profile] for [Wi-Fi connection (STA mode)] and press the OK button.
Camera: Select the SSID of the access point that a smart device is connected to and press the OK button.
Camera: Enter the encryption key.
The camera will connect to the existing network via Wi-Fi.
Camera: Select the IP address configuration method and press the OK button.
When the IP address has been acquired, a dialog indicating that the IP address has been configured will be displayed.
Smart Device: Launch NX MobileAir.
Smart Device: Tap the
(wireless settings) button in the album list.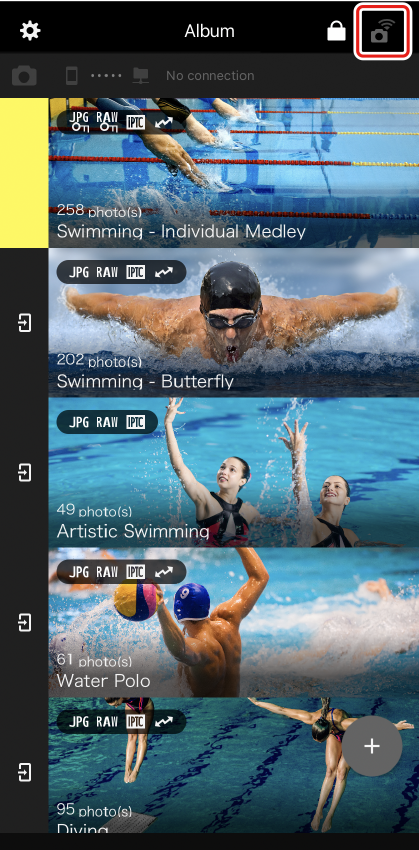
The Wi-Fi settings will be displayed.
Smart Device: Enable [Use Wi-Fi].
Smart Device: Tap the name of the camera you want to connect to in the [Connectable Cameras] list.
Camera: Press the OK button.
If the connection is successful, the camera name will be displayed in the [Connected Cameras] list.
- Cameras that have been connected to the smart device will appear on the [Saved Cameras] list when not connected.
- Tap [Delete] in [Connected Cameras] to disconnect the camera and remove it from [Connectable Cameras] and [Saved Cameras].
Subsequent Connections
When a camera that has been registered in [Saved Cameras] connects to the same wireless LAN access point to which the smart device is connected, it will automatically be added to NX MobileAir's [Connected Cameras]. If multiple cameras are available, the most recently connected camera will be connected. To connect a different camera, tap the name of the camera displayed in [Connectable Cameras].
Synchronizing Clocks
To automatically synchronize the camera clock with the smart device clock when connecting the two devices, select [App options], and enable [Sync clocks] (0App Options). Note that the camera clock will not be changed to the time zone selected on the smart device.
Connecting to the Camera Using the Smart Device as an Access Point
In places with no available wireless LAN network, such as locations outdoors, a wireless connection can be established between the camera and the smart device using the smart device as an access point (Wi-Fi tethering).
- A smart device with Wi-Fi tethering capability is required.
- USB and Bluetooth tethering cannot be used.
- Some mobile carriers impose restrictions or additional fees for tethering. For details, contact your service provider.
-
Smart Device: Enable tethering in the settings app for the smart device.
- The access point name and password displayed in the tethering settings are required to connect the camera.
Camera: In the network menu, select [Connect to smart device], then select [Create profile] for [Wi-Fi connection (STA mode)] and press the OK button.
Camera: Select the SSID of the smart device and press the OK button.
-
Camera: Enter the encryption key.
The camera will connect to the existing network via Wi-Fi.
Camera: Select the IP address configuration method and press the OK button.
When the IP address has been acquired, a dialog indicating that the IP address has been configured will be displayed.
-
Smart Device: Launch NX MobileAir.
Smart Device: Tap the
(wireless settings) button in the album list.The Wi-Fi settings will be displayed.
Smart Device: Enable [Use Wi-Fi].
Smart Device: Tap the name of the camera you want to connect to in the [Connectable Cameras] list.
Camera: Press the OK button.
If the connection is successful, the camera name will be displayed in the [Connected Cameras] list.
- Cameras that have been connected to the smart device will appear on the [Saved Cameras] list when not connected.
- Tap [Delete] in [Connected Cameras] to disconnect the camera and remove it from [Connectable Cameras] and [Saved Cameras].
The Automatic Access Point Disabling Function
If the setting to automatically turn the access point off is enabled on the smart device, the camera may disconnect from the smart device unexpectedly. When using Wi-Fi tethering, be sure to disable the setting to automatically turn the access point off.
- For details, refer to the documentation provided with your smart device.
- As disabling this setting will cause the device’s battery to drain more quickly, it is recommended that you use a fully charged smart device and a mobile battery or similar device.
Subsequent Connections
When a camera that has been registered in [Saved Cameras] connects to the access point of the smart device, it will automatically be added to [Connected Cameras]. If multiple cameras are available, the most recently connected camera will be connected. To connect a different camera, tap the name of the camera displayed in [Connectable Cameras].
Synchronizing Clocks
To automatically synchronize the camera clock with the smart device clock when connecting the two devices, select [App options], and enable [Sync clocks] (0App Options). Note that the camera clock will not be changed to the time zone selected on the smart device.