- Home
- Tool Buttons
Font size
- S
- M
- L
Tool Buttons
Use the tool buttons for access to tools not in the tool list.
- Noise Reduction
- Camera and Lens Corrections
- LCH
- Straighten and Perspective Control
- Unsharp Mask
- Levels & Curves
Noise Reduction
Selecting this tool displays noise reduction controls in the image adjustment palette (see below). After enabling noise reduction by placing a check in the Noise reduction check box, adjust settings as described in this section.


The options available for Method vary with the camera used to create the current picture. If the only option available is Camera compatible, the remaining settings can be adjusted as follows:
If the Method menu is available, choose Faster for faster processing or Better Quality 2013 (RAW images only) or Better Quality for more accurate noise reduction. You can also adjust the following items:

Better Quality 2013
Better Quality 2013 excels in reducing color noise at short wavelengths and over evenly-colored areas of the image. Selecting this option displays additional Luminance and Color items, allowing Intensity and Sharpness to be adjusted separately for each of these parameters.
Camera and Lens Corrections
Selecting this tool displays the following controls in the image adjustment palette:
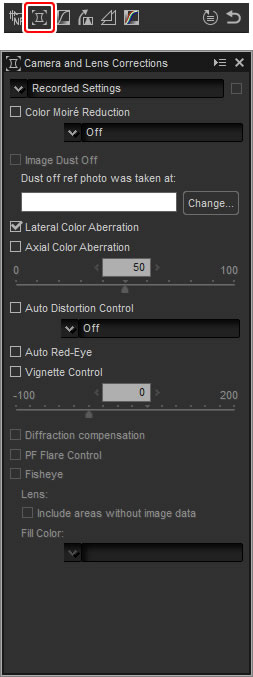
Image Dust Off
Follow the steps below to perform Image Dust Off.
- Click Change…. If the current folder contains an Image Dust Off reference file, a message will be displayed; proceed to Step 2. If no message is displayed, proceed to Step 3.
- To perform Image Dust Off using the file in the current folder, select Yes. Otherwise, select No and proceed to Step 3.
- Select a reference file and click OK to perform Image Dust Off.
Image Dust Off
Dust changes position from day to day; if possible, use reference data recorded in the last 24 hours. If the camera offers image sensor cleaning, use only data recorded after the most recent cleaning, as cleaning can change the position of the dust. Image Dust Off is not available with NEF (RAW) images recorded at an image size setting of Small.
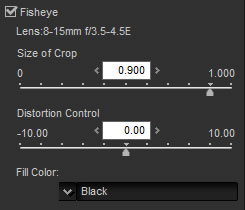
Fisheye
Select Fisheye to process photos taken with fisheye lenses so that they appear to have been taken with a wide-angle rectilinear lens. An area at the center of the image (circular fisheye lenses) or centered around lines drawn horizontally and vertically through the center of the image (full-frame fisheye lenses) is cropped to match the camera picture angle.
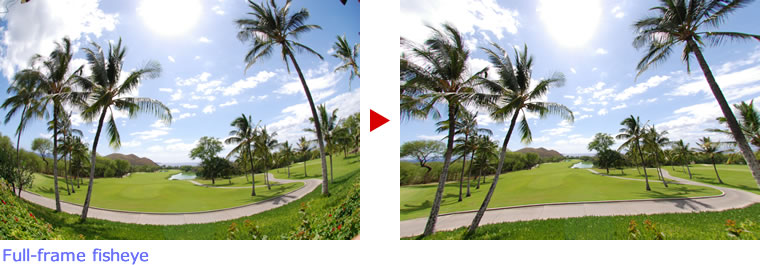
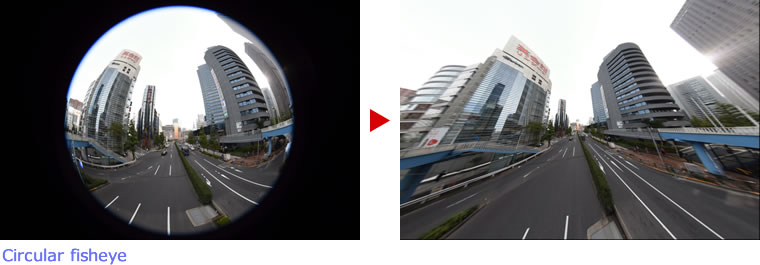
The AF DX Fisheye-Nikkor 10.5mm f/2.8G ED and AF Fisheye-Nikkor 16mm f/2.8D
If Include areas where there is no image data is selected, the image will not be cropped; instead, sections of the image will be bent. The bends contain no image data and are filled with the color selected in the Fill color menu.
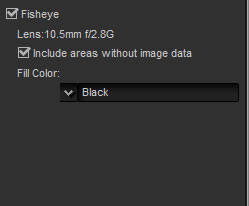
The AF-S Fisheye NIKKOR 8-15mm f/3.5-4.5E ED
The Size of Crop slider controls the size of the crop. The smaller the crop, the more the center of the image will be enlarged. Choosing values closer to 1 with full-frame fisheye images will result in sections containing no image data, which are filled with the color selected in the Fill color menu.
The Distortion Control slider controls distortion. High values curve the image outward, while lower values curve it inward.
LCH
The LCH color space models color using values for lightness (a property similar but not identical to brightness or luminance), chroma (color saturation), and hue. These parameters can be accessed via the channel menu in the image adjustment palette when the LCH tool is selected.
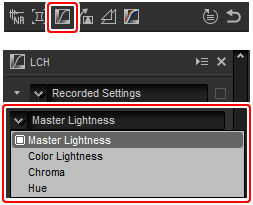
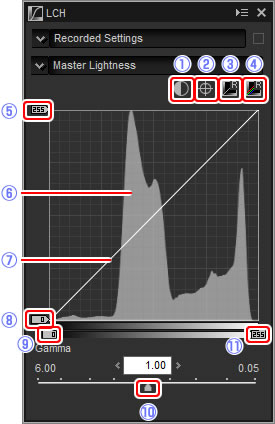
Master Lightness
Adjust overall lightness without affecting chroma or hue.
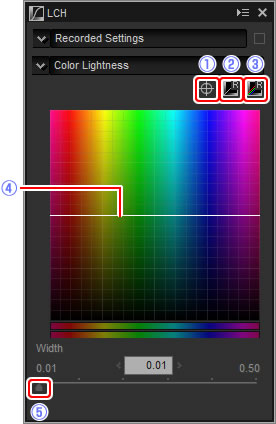
Color Lightness
Adjust the lightness of selected colors without affecting chroma or hue. This can be used, for example, to brighten the blue of a dark skies.
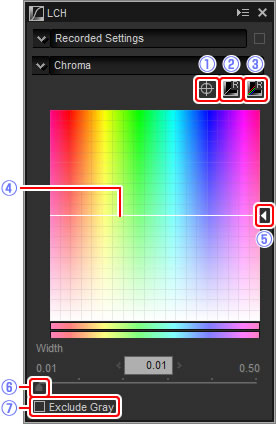
Chroma
Increase or decrease color saturation over the entire image or a portion of the color range, making colors more or less vivid.
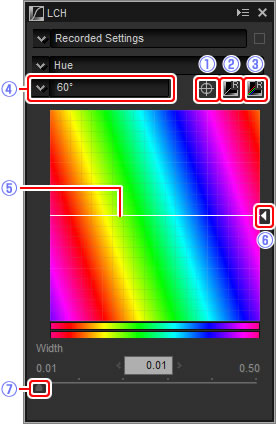
Hue
Map selected colors in the original (input) image to a specific range of colors in the final (output) image. One application might be to deepen the colors in a pale blue sky.
Straighten and Perspective Control
Straighten pictures or correct for the effects of perspective.

Straighten
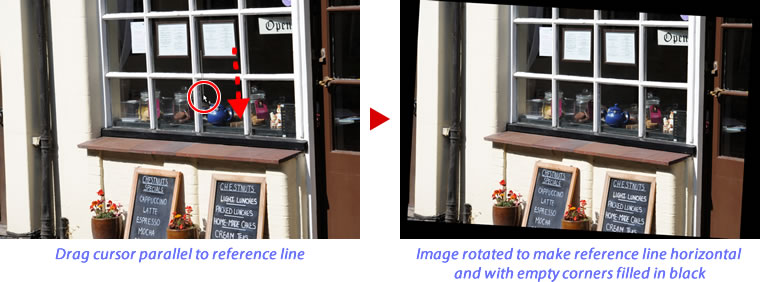
Straighten pictures by up to ±10°. Choose lower values to rotate the picture to the left, higher values to rotate it to the right. To hide the effects of straightening, remove the check from the Straighten checkbox.
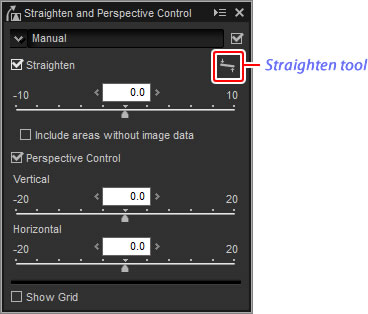
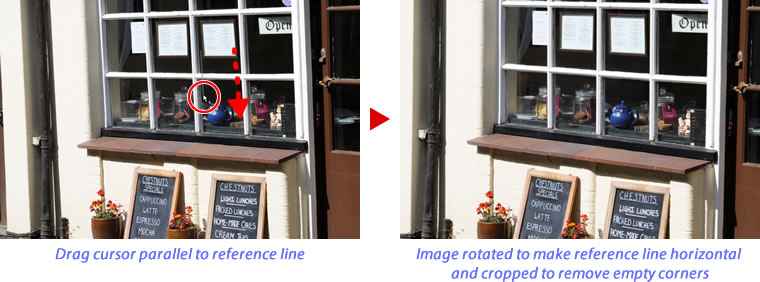
To straighten pictures manually, click the straighten tool in the image adjustment palette and drag the cursor parallel to a line in the preview (this option can not be used with thumbnails). The image will be rotated by up to ±10° to make the reference line horizontal or vertical, and the degree of rotation will be displayed in the text box in the image adjustment window. Unless Include areas without image data is selected, the image will automatically be cropped to remove any empty corners.
Include Areas Without Image Data
Select this option to fill empty corners with black.
Perspective Control
Correct the effect of perspective on, for example, photos taken with the camera angled up to frame a tall building. Perspective can be adjusted vertically and horizontally by up to ±20.

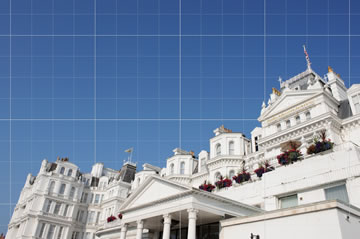
Show Grid
Select this option to display a grid. The grid color and spacing can be selected in the “View” tab of the preferences dialog.
Unsharp Mask
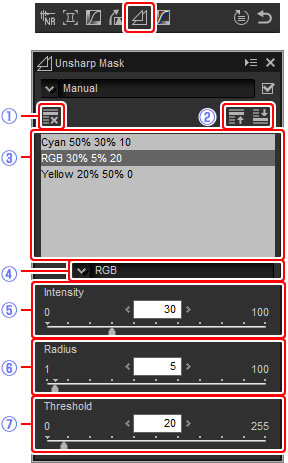
Increase sharpness by making edges more distinct. The contrast of edges is increased while other areas are left untouched.
Levels & Curves
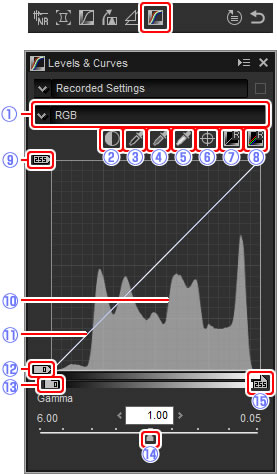
Adjust contrast, tone (brightness), and color balance. Adjustments can be made over the entire image or to specific portions of the tone range (for example, the gamut of a specific printer, monitor, or other output device), allowing enhancements to be made without sacrificing detail.
Sampling the Current Channel
By default, the black point, white point, add anchor point, and auto contrast controls respectively set the black point, anchor points, white point, and contrast for all channels. To apply these controls only to the current channel, press Ctrl (or on Mac computers, the option key) while clicking the control.

 Auto Contrast
 Add Anchor Point
 Reset Current Channel
 Reset All Channel
 White-point output-level slider
 Histogram
 Luminosity curve
 Black-point output-level slider
 Black-point input slider
 Gamma
Gamma White-point input slider
 Black-point output-level slider
 Black-point input slider
 Gamma
Gamma White-point input slider