Step 1: Connect the Camera and Computer
Connect the camera and computer using any of the following methods.
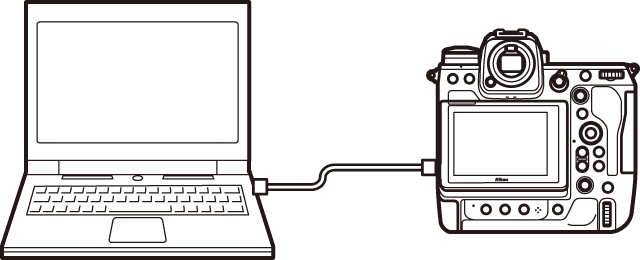
Connecting via USB
Turn the camera off and connect it to the computer using the camera’s supplied USB cable. Turn the camera on once the cable is connected.
- If your camera has two USB connectors (USB data connector and USB Power Delivery connector), connect the cable to the USB data connector.
 Cameras That Do Not Support Wireless Connections
NX Tether cannot be used with the following cameras via a wireless connection. Use a USB cable to connect the camera to the computer.
- Z5
- Z50
- Z30
- Zfc
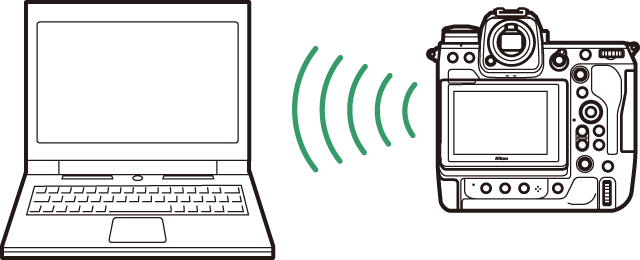
Connecting via Wi-Fi
Connecting Wirelessly via the Camera’s Built-in Wireless LAN (Cameras with Network Menu Options)
Cameras with a network menu can connect to computers wirelessly using built-in wireless LAN transceivers. Connect the camera and computer wirelessly using [Connect to computer] in the network menu.
- For more information, see the “Camera Control” section in the camera Reference Guide.
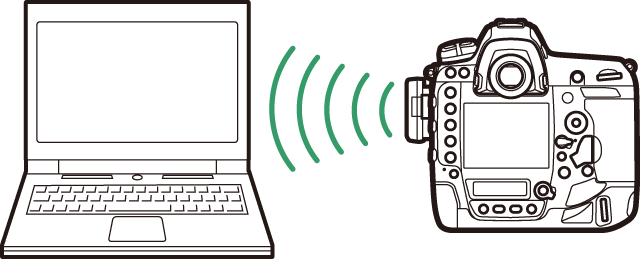
Connecting Wirelessly via a WT‑7 Wireless Transmitter
Compatible cameras can connect to computers wirelessly using optional WT‑7 wireless transmitters. You will need to connect using a host profile configured for [Camera control].
- For more information, see the “Camera Control” section in the documentation for the WT-7. You can follow the same procedure for NX Tether as that for the Camera Control Pro 2 in the documentation for the WT-7. Read “NX Tether” for “Camera Control Pro 2” when referencing the document.

Connecting Wirelessly via a WT‑6 Wireless Transmitter
The D6 can connect to the computer wirelessly via an optional WT‑6 wireless transmitter. You will need to connect using a host profile configured for [Camera control].
- For more information, see the “Camera Control” section in the camera Reference Manual. You can follow the same procedure for NX Tether as that for the Camera Control Pro 2 in the Reference Manual. Read “NX Tether” for “Camera Control Pro 2” when referencing the document.
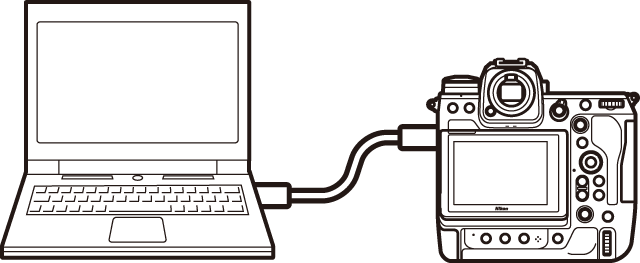
Connecting via Ethernet
Cameras equipped with an Ethernet connector or attached to a WT‑7 can connect to the computer via an Ethernet cable.
- For more information, see the “Camera Control” section in the camera Reference Guide/Reference Manual or the documentation for the WT-7.
- You can follow the same procedure for NX Tether as that for the Camera Control Pro 2 in the documentation for the WT-7. Read “NX Tether” for “Camera Control Pro 2” when referencing the document.
The Download Center
Camera reference guides and WT‑7 documentation are available from the Nikon Download Center.
The Nikon Download Center:
https://downloadcenter.nikonimglib.com/
USB Cables
Use a USB cable that connects to the camera directly from the computer. Connecting via a USB adapter could cause NX Tether’s connection to the camera to end unexpectedly.
Using Multiple Cameras
NX Tether can switch between multiple connected cameras. It supports up to five simultaneous connections but can control only one camera at a time.
Camera Control Pro 2
Camera Control Pro 2 is the software that came before NX Tether, which allows you to control the camera remotely from a computer.
Nikon Transfer 2 and Camera Control Pro 2
NX Tether cannot be used with Nikon Transfer 2 or Camera Control Pro 2. Close these applications before launching NX Tether.
Image Capture (macOS)
When a camera is connected via wireless LAN or Ethernet, the Image Capture application supplied with macOS will launch with the camera displayed in the [SHARED] list. Be advised that should you select the camera in Image Capture, you will not subsequently be able to connect using NX Tether.