

- Home
- Basic Operations of Picture Control Utility 2
- Basic Operations of the Picture Control Utility 2 Windows
- Using Palettes
Font size
- S
- M
- L
Using Palettes
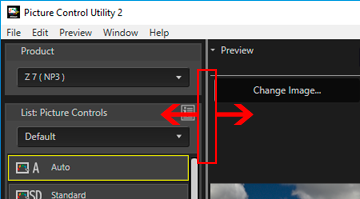
In Picture Control Utility 2, display palettes to perform operations such as importing Picture Control files or adjusting images.
The palette on the left is the [Product]/[List: Picture Controls] palette, the one on the right is the [Adjustments]/[Custom Curve]/[Histogram] palette, and the one at the bottom is the [Share] palette.
- Adjusting palette width
- Separating palettes
- Selecting the display style of the [List: Picture Controls] palette
Adjusting palette width
Drag the border between palettes to adjust the width of each palette.
Separating palettes
The [Adjustments], [Histogram], [Share], and [Custom Curve] palettes can each be displayed as a separate floating window.
- Click the
 button in the upper right of the palette to display the menu, and select [Undock].
 The palette is separated from the main window.You can move the separated window to the desired position by dragging the title bar.To dock the separated window in the main window again, click the button in the right of the title bar to display the menu, and click [Dock].
Selecting the display style of the [List: Picture Controls] palette
The display items in [List: Picture Controls] can be changed.
- Click
 at the upper right to select the desired item.
 The display items change.You can select between [Detail View], [Simple View], and [Customize Detail View...].If you select [Customize Detail View...], the [Preferences] window is displayed, allowing you to choose whether or not to display adjustment values or thumbnails. For details on [Preferences], refer to "Preferences of Picture Control Utility 2".
About the [Tutorial] dialog
The [Tutorial] dialog is displayed only when the Picture Control Utility 2 is launched for the first time.
To quit [Tutorial], click the [Close] button.
To display the [Tutorial] dialog again, select [Tutorial] in the [Window] menu.