Connecting Using Profiles Created on a Computer
- Connecting to Wireless Networks Using a Z9, Z8, Z6III, Z5II, Zf, or ZR
- Connecting to Wireless Networks Using the WT-7, WT-6, or WT-5
- Ethernet Networks (Wired LANs)
- WT-4
Connecting to Wireless Networks Using a Z9, Z8, Z6III, Z5II, Zf, or ZR
-
Turn the camera on.
-
Disable wired LAN.
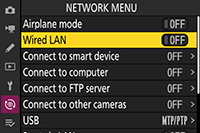
- Z9: Select OFF for Wired LAN in the camera network menu.
- Z8: Select MTP/PTP for USB data connection in the camera network menu.
- Z6III: Select USB-LAN for USB in the camera network menu.
- Z5II / Zf / ZR: Wired LAN is not supported by the camera. Proceed to Step 3.
-
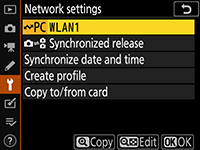
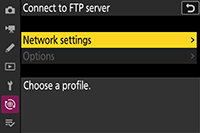
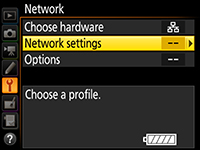
Select Connect to FTP server > Network settings in the camera network menu.
Highlight Network settings and press the multi selector right to view a list of network profiles.

-
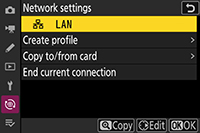
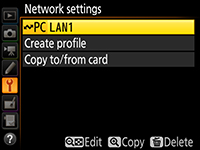
Select a network profile created with a computer.
Highlight a profile and press the OK button to return to the Connect to FTP server menu, at which point the camera will initiate a connection to the network.

Connecting to Wireless Networks Using the WT-7, WT-6, or WT-5
D780 and Z Mount Mirrorless Cameras
-
Connect the WT-7 and turn the camera on.
-
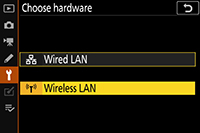
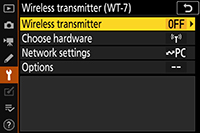
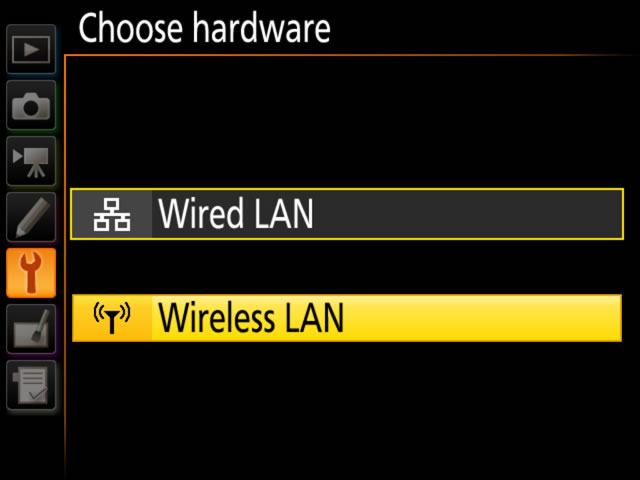
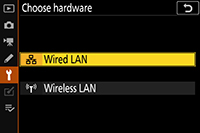
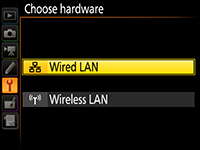
Select Wireless transmitter (WT-7) > Choose hardware > Wireless LAN in the camera setup menu.
Highlight Wireless LAN and press the multi selector right to return to the Wireless transmitter (WT-7) menu.
-
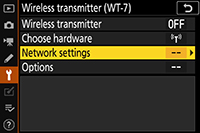
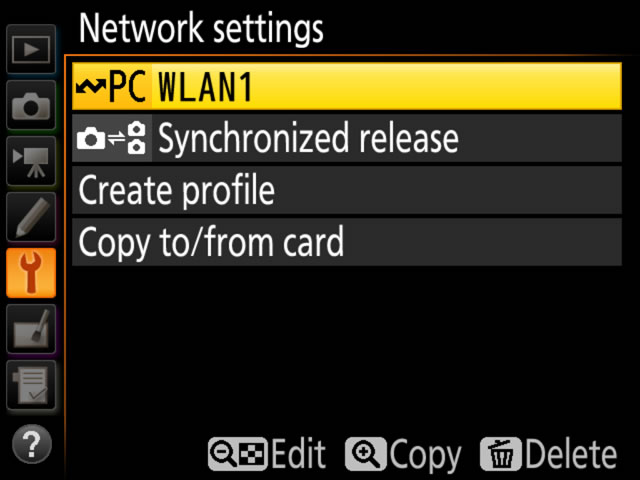
Select Wireless transmitter (WT-7) > Network settings in the camera setup menu.
Highlight Network settings and press the multi selector right to view a list of network profiles.
-
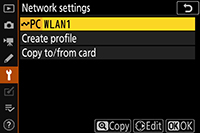
Select a network profile created with a computer.
Highlight a profile and press the OK button to select the highlighted profile and return to the Wireless transmitter (WT-7) menu.
-
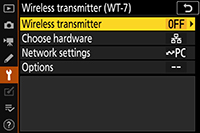
Select Wireless transmitter.
Highlight Wireless transmitter and press the multi selector right to view options.
-
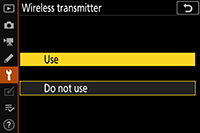
Select Use.
Highlight Use and press the multi selector right to connect to the network.

D6 Cameras
-
Connect the WT-6 and turn the camera on.
-
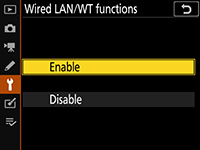
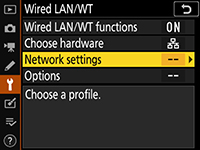
Select Enable for Wired LAN/WT > Wired LAN/WT functions in the camera setup menu.
-
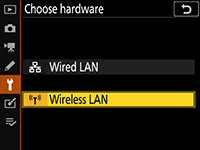
Select Wired LAN/WT > Choose hardware > Wireless LAN in the camera setup menu.
Highlight Wireless LAN and press the multi selector right to return to the Wired LAN/WT menu.
-
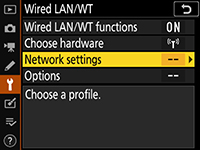
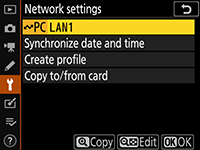
Select Wired LAN/WT > Network settings in the camera setup menu.
Highlight Network settings and press the multi selector right to view a list of network profiles.
-
Select a network profile created with a computer.
Highlight a profile and press the multi selector right to return to the Wired LAN/WT menu. Wait for the camera to establish the connection.
D5, D4-series, D850, D810, D810A, D800, D800E, D750, D500, D7200, D7100, and D7000 Cameras
Cameras can connect using the following wireless transmitters:
- D850 / D810 / D810A / D750 / D500 / D7200: WT-7
- D5: WT-6 or WT-5
- D4-series / D800 / D800E / D7100 / D7000: UT-1 with WT-5
-
Connect a compatible wireless transmitter or the UT-1 and turn the camera on.
-
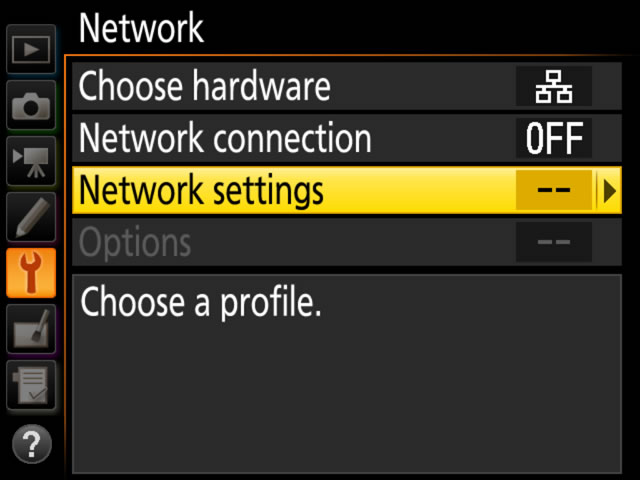
Select Network > Choose hardware > Wireless LAN in the camera setup menu.
Highlight Wireless LAN and press the multi selector right to return to the Network menu.
-
Select Network > Network settings in the camera setup menu.
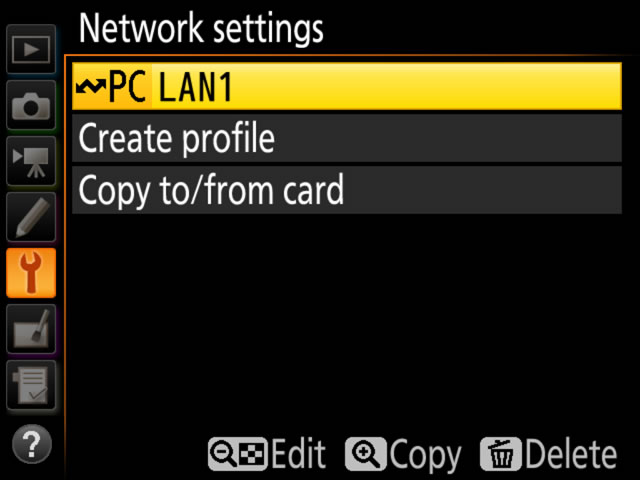
Highlight Network settings and press the multi selector right to view a list of network profiles.

-
Select a network profile created with a computer.
- If you are using a D5 or D4-series camera, proceed to Step 5.
- Otherwise highlight a profile and press the multi selector right to connect to the selected network.
-
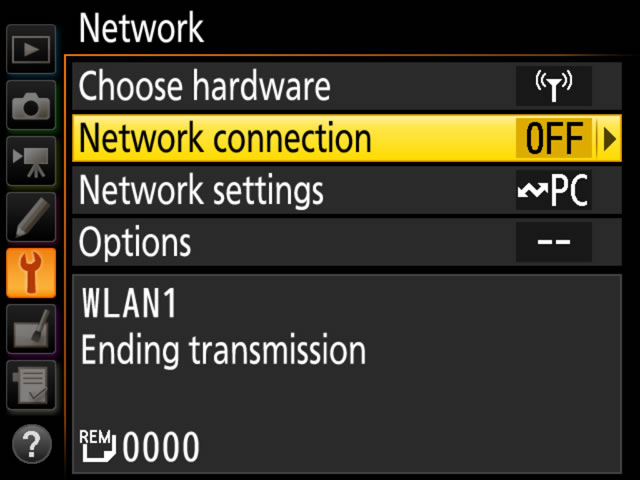
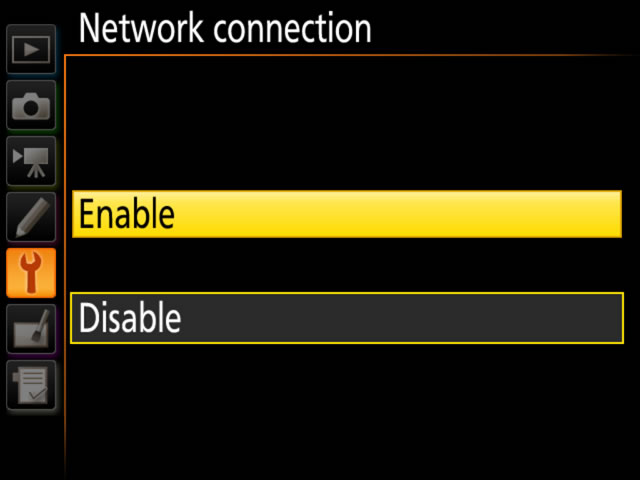
Select Network connection.
Highlight Network connection and press the multi selector right to view options.
-
Select Enable.
Highlight Enable and press the multi selector right to connect to the network.
Ethernet Networks (Wired LANs)
If you are using a D850, D810, D810A, D800, D800E, D750, D500, D7200, D7100, or D7000 camera, connect a compatible wireless transmitter or the UT-1 to the camera before proceeding:
- D850 / D810 / D810A / D750 / D500 / D7200: WT-7
- D800 / D800E / D7100 / D7000: UT-1 with WT-5
Z9, Z8, and Z6III Cameras
-
Connect the camera to a computer or router using an Ethernet cable and turn the camera on.
- When using a Z8, attach a third-party USB-to-Ethernet adapter to the camera’s USB data connector and plug the Ethernet cable into the adapter.
- When using a Z6III, attach a third-party USB-to-Ethernet adapter to the camera’s USB connector and plug the Ethernet cable into the adapter.
- When connecting the Ethernet cable, do not use force or attempt to insert the connectors at an angle.
-
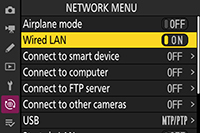
Enable wired LAN.
- Z9: Select ON for Wired LAN in the camera network menu.
- Z8: Select USB-LAN for USB data connection in the camera network menu.
- Z6III: Select USB-LAN for USB in the camera network menu.
-
Select Connect to FTP server > Network settings in the camera network menu.
Highlight Network settings and press the multi selector right to view a list of network profiles.
-
Select a network profile created with a computer.
Highlight a profile and press the OK button to return to the Connect to FTP server menu, at which point the camera will initiate a connection to the network.
Z7II, Z6II, Z7, Z6, and D780 Cameras
-
Connect the WT-7.
-
Connect the camera to a computer or router using an Ethernet cable and turn the camera on.
When connecting the Ethernet cable, do not use force or attempt to insert the connectors at an angle.
-
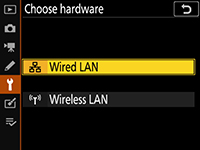
Select Wireless transmitter (WT-7) > Choose hardware > Wired LAN in the camera setup menu.
Highlight Wired LAN and press the multi selector right to return to the Wireless transmitter (WT-7) menu.
-
Select Wireless transmitter (WT-7) > Network settings in the camera setup menu.
Highlight Network settings and press the multi selector right to view a list of network profiles.

-
Select a network profile created with a computer.
Highlight a profile and press the OK button to select the highlighted profile and return to the Wireless transmitter (WT-7) menu.

-
Select Wireless transmitter.
Highlight Wireless transmitter and press the multi selector right to view options.
-
Select Use.
Highlight Use and press the multi selector right to connect to the network.
D6 Cameras
-
Connect the camera to a computer or router using an Ethernet cable and turn the camera on.
When connecting the Ethernet cable, do not use force or attempt to insert the connectors at an angle.
-
Select Enable for Wired LAN/WT > Wired LAN/WT functions in the camera setup menu.
-
Select Wired LAN/WT > Choose hardware > Wired LAN in the camera setup menu.
Highlight Wired LAN and press the multi selector right to return to the Wired LAN/WT menu.
-
Select Wired LAN/WT > Network settings in the camera setup menu.
Highlight Network settings and press the multi selector right to view a list of network profiles.
-
Select a network profile created with a computer.
Highlight a profile and press the multi selector right to return to the Wired LAN/WT menu. Wait for the camera to establish the connection.
D5 and D4-Series Cameras
-
Connect the camera to a computer or router using an Ethernet cable and turn the camera on.
When connecting the Ethernet cable, do not use force or attempt to insert the connectors at an angle.
-
Select Network > Choose hardware > Wired LAN in the camera setup menu.
Highlight Wired LAN and press the multi selector right to return to the Network menu.

-
Select Network > Network settings in the camera setup menu.
Highlight Network settings and press the multi selector right to view a list of network profiles.
-
Select a network profile created with a computer.
Highlight a profile and press the multi selector right to return to the Network menu.
-
Select Network connection.
Highlight Network connection and press the multi selector right to view options.

-
Select Enable.
Highlight Enable and press the multi selector right to connect to the network.

D850, D810, D810A, D800, D800E, D750, D500, D7200, D7100, and D7000 Cameras
Cameras can connect using the following wireless transmitters:
- D850 / D810 / D810A / D750 / D500 / D7200: WT-7
- D800 / D800E / D7100 / D7000: UT-1 with WT-5
-
Connect a WT-7 or UT-1.
-
Connect the camera to a computer or router using an Ethernet cable and turn the camera on.
When connecting the Ethernet cable, do not use force or attempt to insert the connectors at an angle.
-
Select Network > Choose hardware > Wired LAN in the camera setup menu.
Highlight Wired LAN and press the multi selector right to return to the Network menu.
-
Select Network > Network settings in the camera setup menu.
Highlight Network settings and press the multi selector right to view a list of network profiles.
-
Select a network profile created with a computer.
Highlight a profile and press the multi selector right to connect to the network.
WT-4
-
Connect the WT-4 and turn the camera on.
-
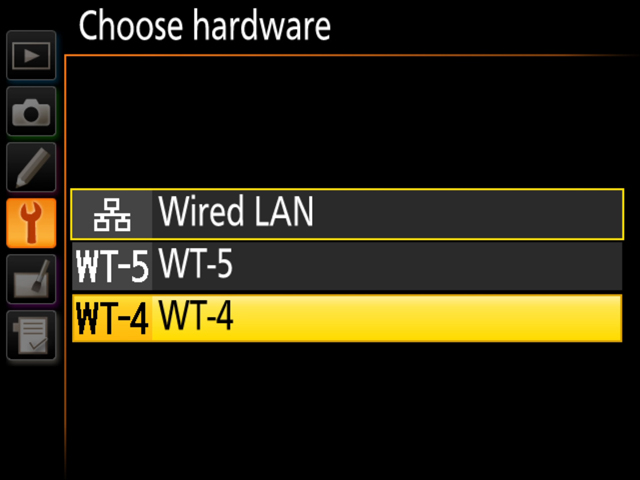
Select Network > Choose hardware > WT-4 in the camera setup menu.
Highlight WT-4 and press the multi selector right to return to the Network menu.
-
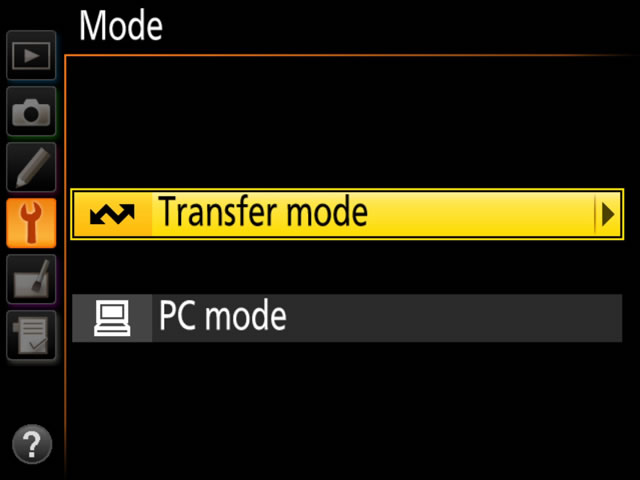
Select Network > Mode in the camera setup menu.
Choose from Transfer mode and PC mode. Pressing the multi selector right displays a list of network profiles.
-
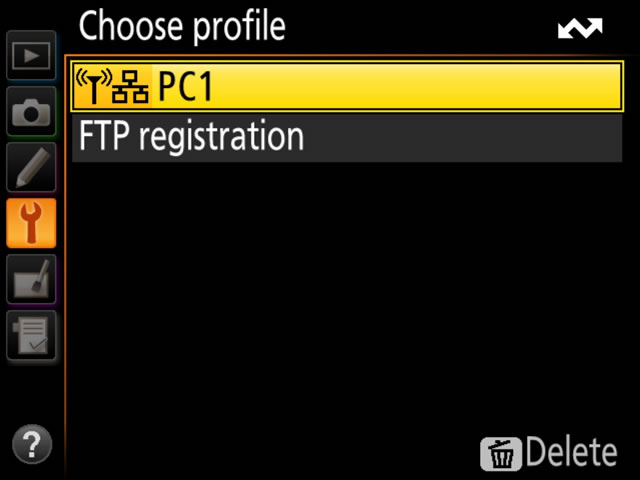
Select a network profile created with a computer.
Highlight a profile and press the multi selector right to select and return to the Network menu. If you selected Transfer mode in Step 3, adjust Transfer settings as described in the WT-4 manual.
-
Turn on the WT-4.
The profile name in the Network menu will turn green when a connection is established.