Cameras with Built-in Wireless LAN
Follow the steps below to connect to cameras with built-in wireless LAN.
Cameras that Support Built-in Wireless LAN Connection
Z9, Z8, Z6III, Z7II, Z6II, Z7, Z6, Z5II, Z5, Zf, Z50II, Z50, Z30, Zfc, ZR, D6, and D780
D850, D750, D500, and D7200 Cameras
These cameras cannot be paired with a computer via built-in wireless LAN. Use a compatible network accessory.
Launch the Wireless Transmitter Utility after creating a network profile on the camera. Click Cancel to exit the Wireless Transmitter Utility if it has already launched.
-
Create a new network profile using Network settings.
The path to Network settings varies with the camera:
- D6: Setup menu > Connect to PC (built-in Wi-Fi) > Network settings
- Z9 / Z8 / Z6III / Z5II / Zf / Z50II / ZR: Network menu > Connect to computer > Network settings
- Z7II / Z6II / Z7 / Z6 / Z5 / Z50 / Z30 / Zfc / D780: Setup menu > Connect to PC > Network settings
For more information, see the camera Reference Manual (users of the Z7 and Z6 are instead referred to the Network Guide).
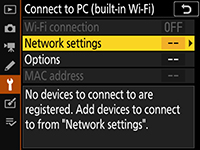
The camera name will be displayed when a network or host is detected.
-
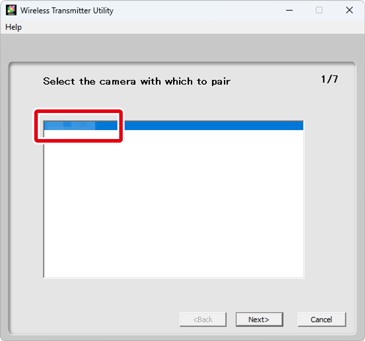
Launch the Wireless Transmitter Utility.
After confirming that the camera name shown in Step 1 is listed, click Next.
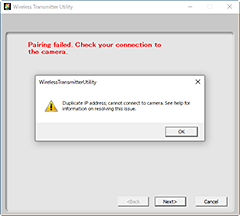
Unable to Connect?
When you click Next in Step 2 after selecting Direct connection to computer (access point mode) in the camera Network settings dialog in Step 1, a message like that shown in the illustration may be displayed, preventing you proceeding to the next step. In access point mode, the camera’s IP address is fixed at “192.168.1.1”, and the computer will not be able to establish a wireless connection to the camera if it is already connected to a device with this IP address. In this event, try one of the solutions listed below.
- Change the router’s IP address.
- If the router’s IP address is “192.168.1.1”, assign it a different address.
- For more information, see the documentation provided with the router.
- Temporarily suspend the computer’s connection to the router.
- When pairing with the camera or downloading pictures, you can suspend the connection to the router and connect only to the camera. If the message does not clear from the display, restart the computer without reconnecting to the router.
- You can reconnect to the router after ending the wireless connection to the camera if you later need to connect to the Internet or the like.
- Create a network profile using Search for Wi-Fi network (infrastructure mode) in the camera Network settings dialog.
- Change the router’s IP address.
-
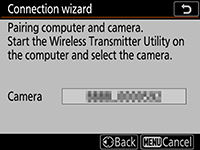
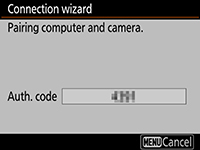
Note the authentication code.
Note the authentication code displayed in the camera monitor.
-
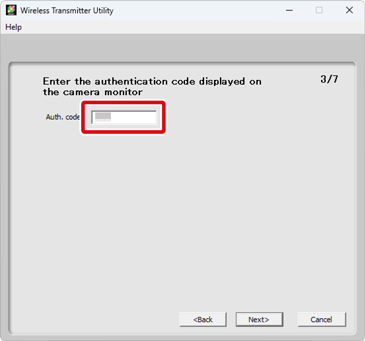
Enter the authentication code.
Enter the authentication code in the Wireless Transmitter Utility and click Next.
-
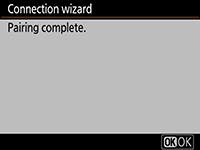
Complete pairing.
The Wireless Transmitter Utility will pair the camera and computer automatically. When pairing is complete, the camera and Wireless Transmitter Utility will display messages to that effect; press the OK button on the camera and click Next in the Wireless Transmitter Utility.

-
Choose the destination folder and application.
You can choose the destination folder for pictures downloaded from the camera in image transfer mode. Click Browse to select from a list of available folders. You cannot choose a sub-folder in this dialog.
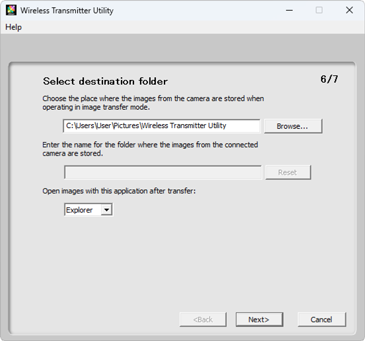
The default destination is:
- Windows: \Users\“user name”\Pictures\Wireless Transmitter Utility
- macOS: /Users/“user name”/Pictures/Wireless Transmitter Utility
The application used to display pictures when transfer is complete can be selected from Open images with this application after transfer menu; choose from Windows Explorer (or in macOS, the Finder), NX Studio, Capture NX-D, and ViewNX-i. Applications that are not installed will not be listed.
After completing this step, click Next and follow the on-screen instructions.
Choosing a Sub-folder
To choose a sub-folder for pictures downloaded from the camera, close the window, connect the camera and computer via USB, and then relaunch the Wireless Transmitter Utility. When prompted to choose hardware, select Camera’s built-in Wi-Fi, click Next, and select Select destination folder and application in the action dialog. Clicking Next will then take you to a dialog where you can select a sub-folder under the destination folder.
-
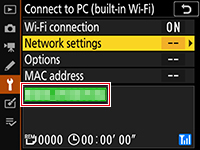
Confirm that the camera is connected.
When a connection is established, the camera will display the network profile name (by default, the network SSID) in green.
“Camera Control”
If Camera control is selected in the network profile, the profile name will be displayed in green once a connection has been established and Camera Control Pro 2 or NX Tether has been launched.