- Android
- iOS
Adding Text to Pictures
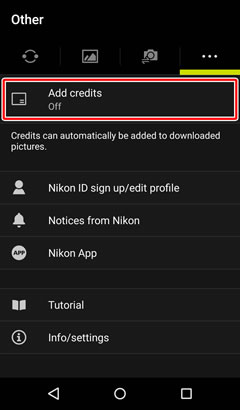
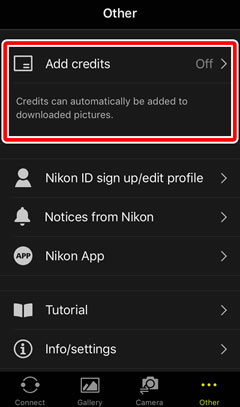
The Add credits option in the Other tab is used to create and edit credits and imprint them on pictures as they are downloaded to the smart device.
Editing Credits
Credits can be edited using Add credits > Type.
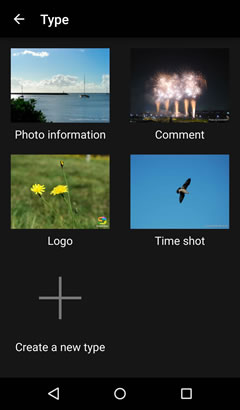
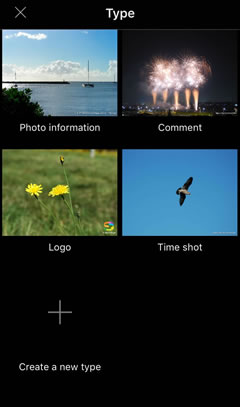
Use Type to choose the type of information added to downloaded pictures. After tapping the thumbnail to preview the effect, select an option and tap Apply; the selected credits will be added to pictures when Add credits is enabled.
- Photo information: Add the camera name, lens focal length, aperture, and shutter speed.
- Position: Choose the position in which the information is displayed.
- Comment: Add a comment.
- Position: Choose the position in which the comment is displayed.
- Enter description: Enter the comment.
- Logo: Add a logo.
- Position: Choose the position in which the logo is displayed.
- Logo image: Choose the logo.
- Time shot: Add the date and time at which the picture was taken.
- Position: Choose the position in which the date and time are displayed.
- Create a new type: Create custom credits by combining two of the above types. SnapBridge 360/170 can store up to two custom types.
Creating Custom Credits
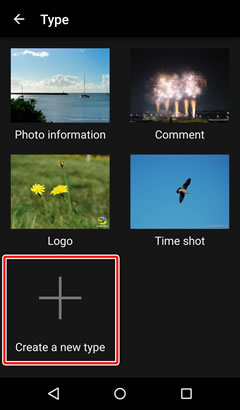
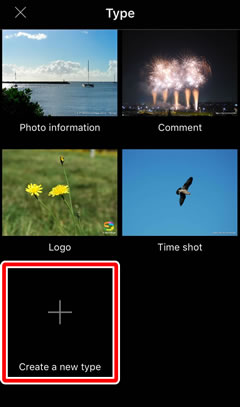
You can create up to two custom credit types.
-
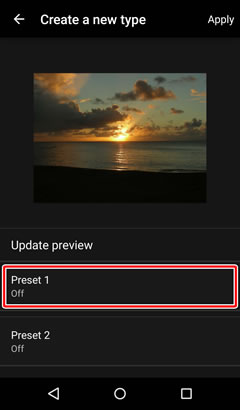
In the Type list, tap Create a new type.
-
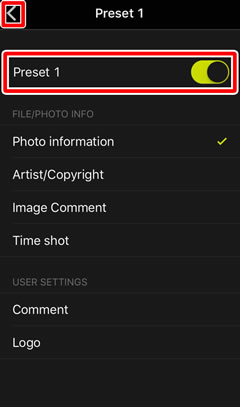
Tap Preset 1.
-
Select On, choose the credits you want to add, and then tap
 .
.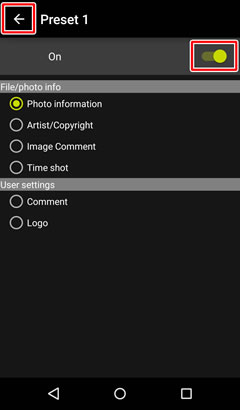
Choose from the following options:
- File/photo info: Imprint photos with the camera name, lens focal length, aperture, and shutter speed (Photo information); copyright information (Artist/Copyright) or comments (Image Comment) entered with the camera; or the date and time of recording (Time shot). The options available vary with the type of camera. Copyright information and comments can be entered using the Camera Settings > Copyright information and Image Comment options in the Camera tab.
- User settings: Enter a comment (Comment) or logo (Logo) to be imprinted on pictures.
-
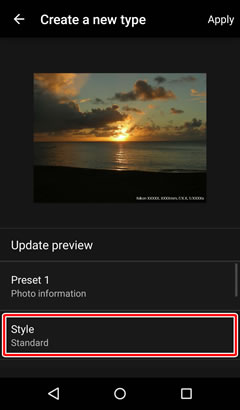
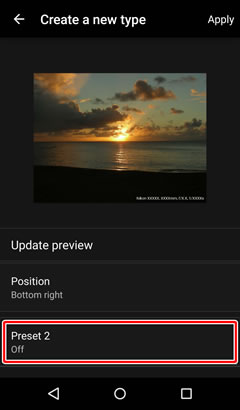
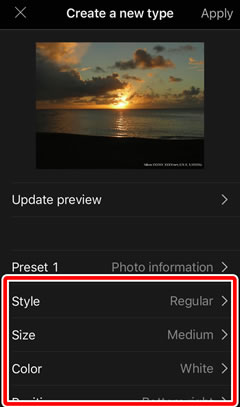
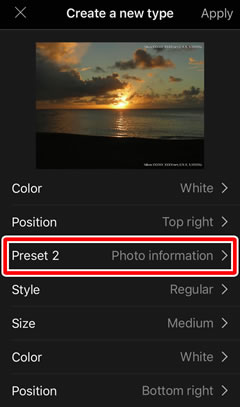
Choose a format for the credits, including the font and position. The options available vary with the items selected.
-
Repeat the above steps for Preset 2.
-
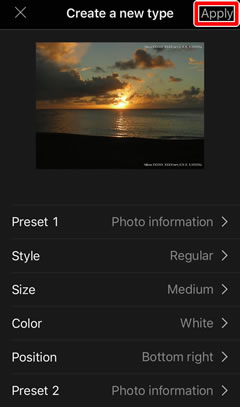
Tap Apply to save the presets as Custom 1 and Custom 2.

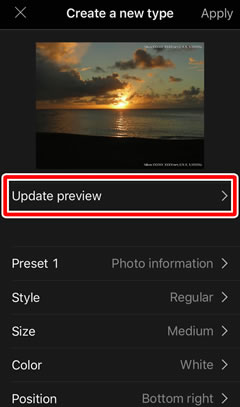
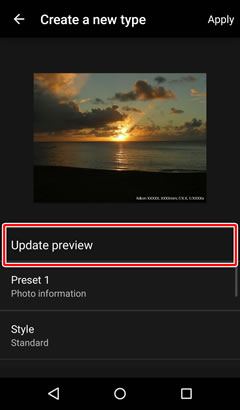
Preview
Credits can be previewed by tapping the preview image. Tap Update preview to update the sample image.
Editing Credits
Credits can be edited using Add credits > Type.
Use Type to choose the type of information added to downloaded pictures. After tapping the thumbnail to preview the effect, select an option and tap Apply; the selected credits will be added to pictures when Add credits is enabled.
- Photo information: Add the camera name, lens focal length, aperture, and shutter speed.
- Position: Choose the position in which the information is displayed.
- Comment: Add a comment.
- Position: Choose the position in which the comment is displayed.
- Enter description: Enter the comment.
- Logo: Add a logo.
- Position: Choose the position in which the logo is displayed.
- Logo image: Choose the logo.
- Time shot: Add the date and time at which the picture was taken.
- Position: Choose the position in which the date and time are displayed.
- Create a new type: Create custom credits by combining two of the above types. SnapBridge 360/170 can store up to two custom types.
Creating Custom Credits
You can create up to two custom credit types.
-
In the Type list, tap Create a new type.
-
Tap Preset 1.

-
Select On, choose the credits you want to add, and then tap
 .
.
Choose from the following options:
- File/photo info: Imprint photos with the camera name, lens focal length, aperture, and shutter speed (Photo information); copyright information (Artist/Copyright) or comments (Image Comment) entered with the camera; or the date and time of recording (Time shot). The options available vary with the type of camera. Copyright information and comments can be entered using the Camera Settings > Copyright information and Image Comment options in the Camera tab.
- User settings: Enter a comment (Comment) or logo (Logo) to be imprinted on pictures.
-
Choose a format for the credits, including the font and position. The options available vary with the items selected.
-
Repeat the above steps for Preset 2.
-
Tap Apply to save the presets as Custom 1 and Custom 2.
Preview
Credits can be previewed by tapping the preview image. Tap Update preview to update the sample image.