- Android
- iOS
Pairing for the First Time After Purchase (KeyMission 170)
When you turn your camera on for the first time after purchase, you can use SnapBridge 360/170 to pair it with a smart device as described below (the illustrations in the descriptions that follow may differ from those displayed by your camera or smart device).
Updating Camera Firmware
Be sure to use the latest version of the camera firmware, available for download from the Nikon Download Center.
Before Pairing
Ready the camera and smart device. Before using the camera:
- Check that the battery has sufficient charge to prevent the camera turning off unexpectedly.
- Insert a memory card after checking to be sure that it has space available.
- Check that the HDMI and USB cables are disconnected.
Before using the smart device, check that SnapBridge 360/170 is installed. (There are two versions of the SnapBridge app: SnapBridge and SnapBridge 360/170. Use SnapBridge 360/170 with the KeyMission 170.)
![]()
Pairing
-
Camera: Confirm that the camera is off and the power lamp is out. If the camera is on (i.e., if the monitor is on), press the movie button for at least 3 seconds to turn the camera off.
-
Smart device: Enable Wi-Fi and Bluetooth but do not initiate pairing.
-
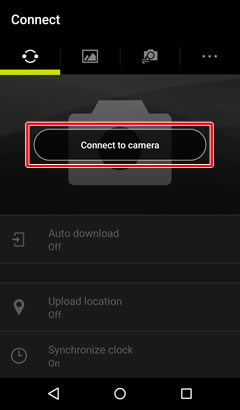
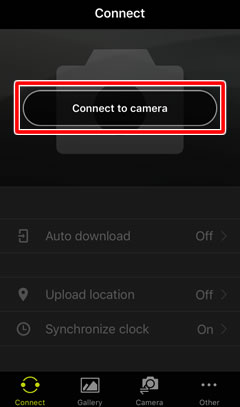
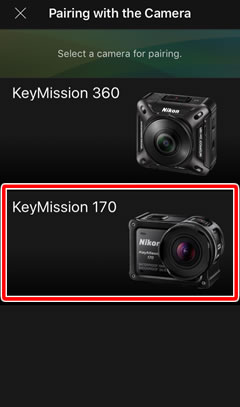
Smart device: Launch SnapBridge 360/170 and tap Connect to camera in the Connect tab.
-
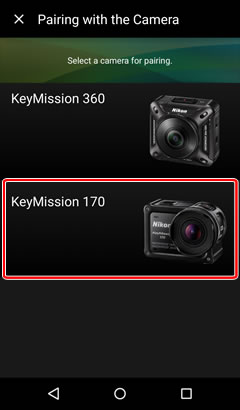
Smart device: Tap to select the KeyMission 170.
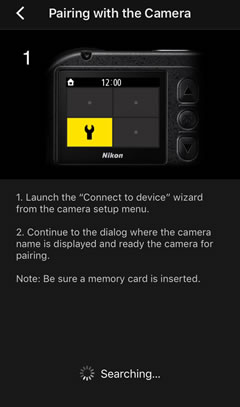
The app will display an animation explaining pairing. Read the instructions before proceeding.

-
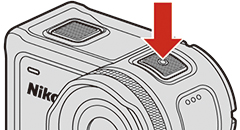
Camera: Press the movie or photo button to turn the camera on.

-
Camera: Highlight a language and press OK.
-
Camera: Press
 to scroll down, then highlight Options and press OK.
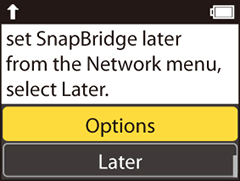
Using NFC
After completing Step 7, touch the NFC antenna on the smart device to the camera
 logo (N-Mark). SnapBridge 360/170 will start automatically and display a message. Select OK and proceed to Step 11.
Before proceeding, check that NFC is enabled and exit all apps that use NFC, including SnapBridge 360/170, as otherwise pairing may fail.
“Later”
If you selected Later, you can start pairing at any time by pressing OK to display the menus and selecting Camera settings > Network menu > Connect to device > OK in the
 (setup) menu to display the dialog shown in Step 7.
 -
Camera: Press
to scroll down, then highlight Next and press OK. Press to scroll down and check the app and camera names.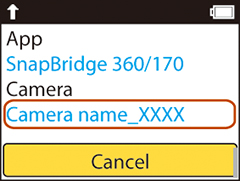
The status lamps will blink alternately red and green to indicate that the camera is ready for pairing.

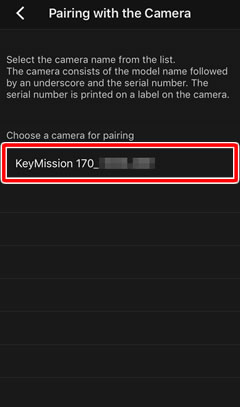
-
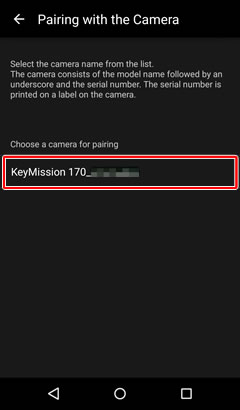
Smart device: Tap the camera name.
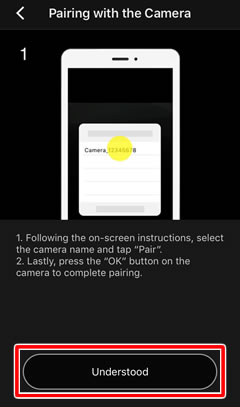
-
Smart device: Tap Understood.
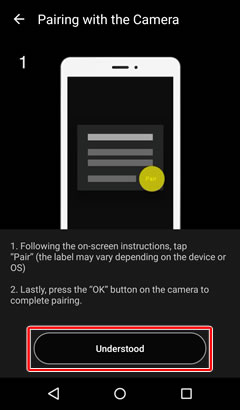
Read the instructions before proceeding.
-
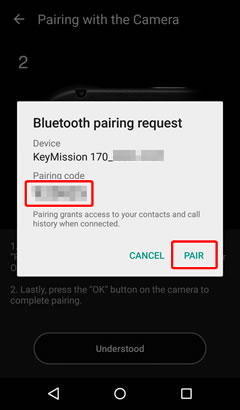
After checking the authentication code, press
on the camera to scroll down, then highlight OK and press OK on the camera and tap the PAIR button on the smart device (the PAIR button may be labelled differently depending on what version of the operating system you are using).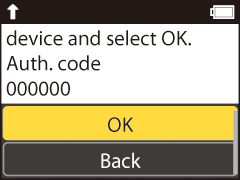
If you wait too long between pressing the button on the camera and tapping the button in SnapBridge, pairing will fail and an error will be displayed.
- Camera: Highlight OK and press OK. After a short pause, a dialog will be displayed; highlight Reconnect and press OK.
- Smart device: Return to Step 3.
-
Camera/smart device: Follow the on-screen instructions to complete pairing.
Camera: The following dialog will be displayed when pairing is complete. Highlight Next and press OK, then follow the on-screen instructions.
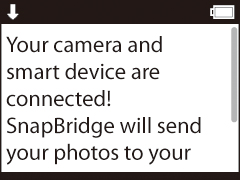
Smart device: Follow the on-screen instructions.
If Pairing Fails
If pairing fails, press the camera movie button for at least 3 seconds to turn the camera off and then exit the SnapBridge 360/170 app and ensure that it is not running in the background (you should also do the same for SnapBridge if it is running). You can then repeat the steps in “Pairing” to pair the camera with the smart device.
If the Language-Selection Dialog Is Not Displayed
If the language selection dialog is not displayed when you turn the camera on, start pairing as described under “Later”.
Before Pairing
Ready the camera and smart device. Before using the camera:
- Check that the battery has sufficient charge to prevent the camera turning off unexpectedly.
- Insert a memory card after checking to be sure that it has space available.
- Check that the HDMI and USB cables are disconnected.
Before using the smart device, check that SnapBridge 360/170 is installed. (There are two versions of the SnapBridge app: SnapBridge and SnapBridge 360/170. Use SnapBridge 360/170 with the KeyMission 170.)
![]()
Pairing
-
Camera: Confirm that the camera is off and the power lamp is out. If the camera is on (i.e., if the monitor is on), press the movie button for at least 3 seconds to turn the camera off.
-
Smart device: Enable Wi-Fi and Bluetooth but do not initiate pairing.
-
Smart device: Launch SnapBridge 360/170 and tap Connect to camera in the Connect tab.
-
Smart device: Tap to select the KeyMission 170.
The app will display an animation explaining pairing. Read the instructions before proceeding.
-
Camera: Press the movie or photo button to turn the camera on.
-
Camera: Highlight a language and press OK.
-
Camera: Press
to scroll down, then highlight Options and press OK.“Later”
If you selected Later, you can start pairing at any time by pressing OK to display the menus and selecting Camera settings > Network menu > Connect to device > OK in the
(setup) menu to display the dialog shown in Step 7. -
Camera: Press
to scroll down, then highlight Next and press OK. Press to scroll down and check the app and camera names.The status lamps will blink alternately red and green to indicate that the camera is ready for pairing.
-
Smart device: Tap the camera name.
-
Smart device: Tap Understood.
Read the instructions before proceeding.
-
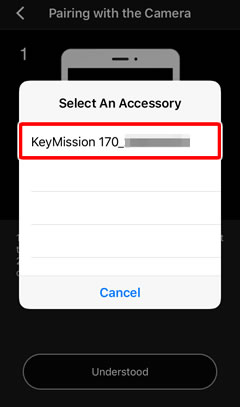
Smart device: When prompted to select an accessory, tap the camera name (it may be some time before the camera name is displayed).
-
After checking the authentication code, press
on the camera to scroll down, then highlight OK and press OK on the camera and tap the Pair button on the smart device (the Pair button may be labelled differently depending on what version of the operating system you are using).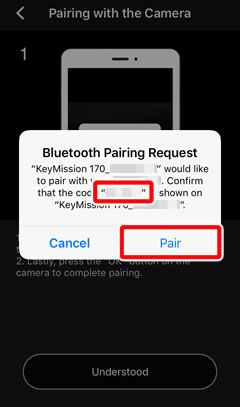
If you wait too long between pressing the button on the camera and tapping the button in SnapBridge 360/170, pairing will fail and an error will be displayed.
- Camera: Highlight OK and press OK. After a short pause, a dialog will be displayed; highlight Reconnect and press OK.
- Smart device: Return to Step 3.
-
Camera/smart device: Follow the on-screen instructions to complete pairing.
Camera: The following dialog will be displayed when pairing is complete. Highlight Next and press OK, then follow the on-screen instructions.
Smart device: Follow the on-screen instructions.
If Pairing Fails
If pairing fails, press the camera movie button for at least 3 seconds to turn the camera off. Quit SnapBridge 360/170 and ensure that it is not running in the background (do the same for SnapBridge if it is running) and then follow the steps below to “forget” the camera on your iOS device. You can then repeat the steps in “Pairing” to pair the device with your camera.
-
 Open the iOS Settings app and tap Bluetooth.
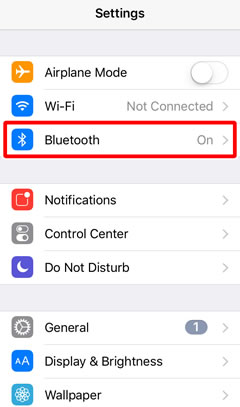
-
 Tap the
  icon to the right of the camera name.
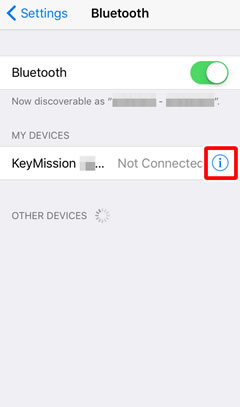
-
 Tap the “forget” option.
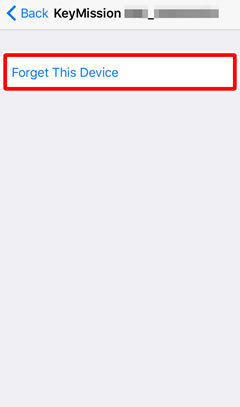
If the Language-Selection Dialog Is Not Displayed
If the language selection dialog is not displayed when you turn the camera on, start pairing as described under “Later”.