|
Copy the firmware to the memory card
|
| |
The firmware can be copied to the camera memory card using a computer equipped with a card reader or card slot. |
| |
| 1 |
Insert a formatted memory card in the card reader or card slot. If ViewNX 2 is installed, Nikon Transfer 2 may start automatically; exit the application before proceeding. |
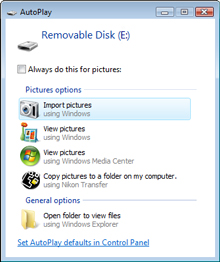
Windows 7/Windows Vista
Under Windows 7/Windows Vista, an AutoPlay dialog may be displayed. Click  . . |
 |
| |
|
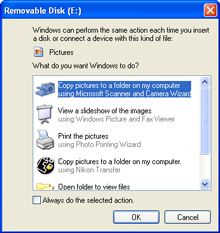
Windows XP
Under Windows XP, a Removable Disk dialog may be displayed. Click Cancel. |
 |
|
| |
| 2 |
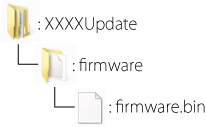
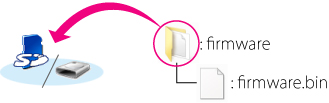
Copy the “firmware” folder to the memory card. |
 |
| |
| When copying is complete, open the “firmware” folder on the memory card and confirm that it contains the file “firmware.bin”. |
| |
Important
Be sure to copy the “firmware” folder to the root directory of the memory card. The camera will not recognize the new firmware if it is placed in a folder under the root directory. |
| |
| 3 |
If your computer shows the memory card as a removable disk, right-click the removable disk and select Eject from the menu that appears. Remove the memory card from the card reader or card slot. |
 |
Update the camera firmware |
| |
The menus displayed on your camera may differ from those shown here. |
| |
| During the update, do not: |
| • |
Remove the memory card |
| • |
Turn the camera off |
| • |
Unplug or disconnect the AC adapter |
| • |
Remove the battery |
| • |
Subject the camera to powerful electromagnetic noise |
| Any of the above actions could cause the camera to become inoperable. |
| |
| 1 |
Insert the memory card containing the firmware into the camera memory card slot. |
| |
| 2 |
Turn the camera on. |
| |
| 3 |
With the camera in shooting or playback mode, press the MENU button and tap the  (setup) icon. (setup) icon. |
| |
| 4 |
 Scroll to display Firmware version and tap to select. Scroll to display Firmware version and tap to select. |
| |
| 5 |
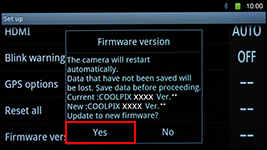 A firmware update dialog will be displayed. Tap Yes to begin the update. A firmware update dialog will be displayed. Tap Yes to begin the update. |
| |
| |
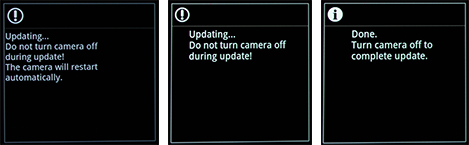
The messages shown below will be displayed and the camera will restart during the update. The update is complete when the camera displays the message shown below at right. |
| |
| |
 |
| |
| |
| 6 |
Confirm that the update was completed successfully.
| 6-1. |
Turn the camera off and remove the memory card. |
| 6-2. |
Check the camera firmware version as described in Step 2, “Check the current camera firmware version”. |
| 6-3. |
 If the updated version is displayed, the update was successful. If the updated version is displayed, the update was successful. |
| “XXXX” is the camera name and “**” the firmware version. |
|
| |
| If the update was not successful, contact a Nikon service representative. |
| |
| 7 |
Format the memory card in the camera. |
| |
| This completes the firmware update. |